Brian Davis
Unveiling the Future: A Deep Dive into VR Headsets 3D

Hey everyone! So, virtual reality, right? It’s not just for gamers anymore. We’re talking about something that’s really changing how we see and do things, way beyond just playing games. This article is all about what’s new and what’s coming next for VR headsets, especially the 3D kind. We’ll look at everything from how they show us stuff to how we interact with those virtual worlds. It’s pretty cool how far things have come, and it’s only going to get crazier. If you’re curious about the future of VR, especially 3D VR headsets, you’re in the right place. Check out more at http://vrheadsets3d.com:80/?p=3349.
Key Takeaways
- VR displays are getting way better, making virtual worlds look more real.
- New ways to track your hands and body mean you can control things in VR naturally.
- Headsets are becoming more like standalone computers, and cloud VR is a thing.
- Comfort is a big deal now, with lighter materials and designs that fit everyone.
- VR is being used for lots of stuff besides games, like teaching and healthcare.
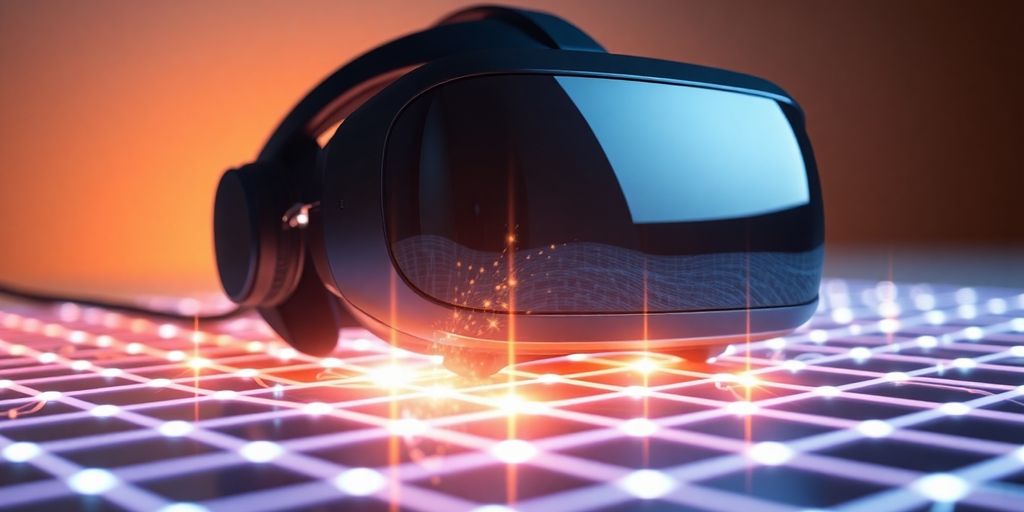
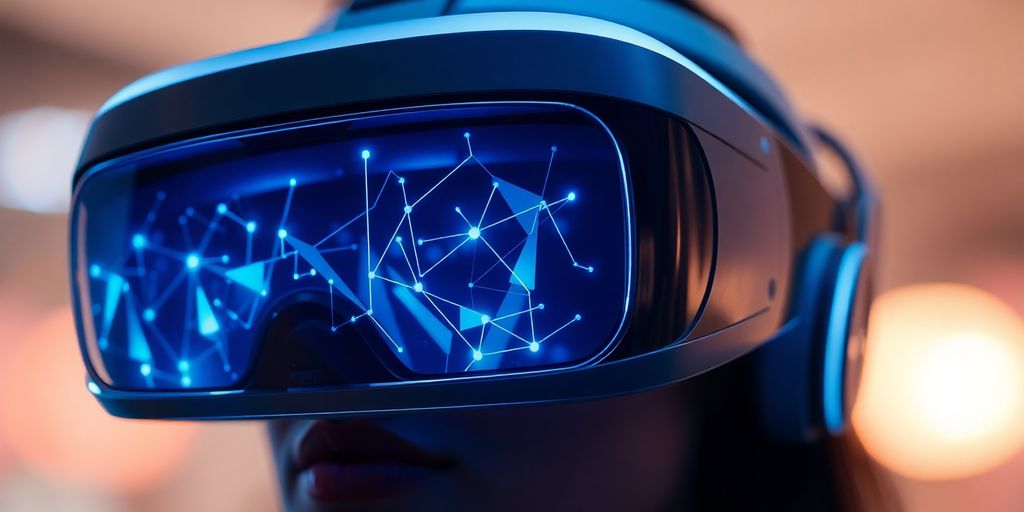
The Evolution of Virtual Reality Displays
From Pixels to Presence: A Visual Journey
Okay, so let’s talk about how VR displays have changed. It’s kinda wild when you think about it. Remember those old VR headsets? Blocky pixels everywhere! Now, things are way smoother. The jump in resolution is probably the biggest thing.
- Early headsets were all about just getting something on your face.
- Then, it was about making it look good.
- Now, it’s about tricking your brain into thinking it’s real.
It’s a constant push for better and better visuals. It’s not just about the number of pixels, though. It’s about how those pixels are used.
Enhancing Immersion Through Display Technology
It’s not just about resolution, it’s about how the display works. OLED screens are a big deal because they have better contrast. LCDs are still around, but OLED is where it’s at for immersion. Refresh rates matter too. If the screen can’t keep up with your head movements, you get motion sickness. Nobody wants that! head-mounted display tech has come a long way.
The Quest for Unrivaled Visual Fidelity
So, what’s next? Well, everyone wants displays that are indistinguishable from reality. That means higher resolutions, wider fields of view, and better color accuracy. Micro-OLED is something to watch. It’s supposed to be super sharp and efficient. And foveated rendering? That’s where the headset only renders the part of the image you’re looking at in high detail. Saves a ton of processing power. It’s all about making the experience as real as possible.
The goal is to create a visual experience so compelling that users forget they are wearing a headset. This involves not only improving the technical specifications of the displays but also optimizing the software and rendering techniques to take full advantage of the hardware’s capabilities. The future of VR displays is about blurring the line between the virtual and the real.
Revolutionary Tracking and Interaction
Okay, so the visuals are important, but what about actually doing stuff in VR? That’s where tracking and interaction come in. It’s not just about seeing a cool world; it’s about reaching out and touching it (virtually, of course!). The advancements here are seriously changing the game.
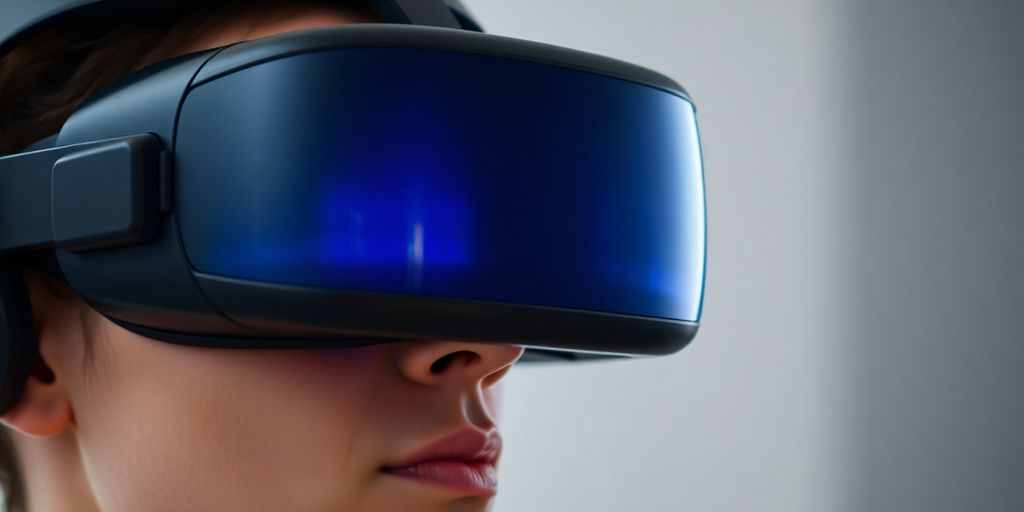
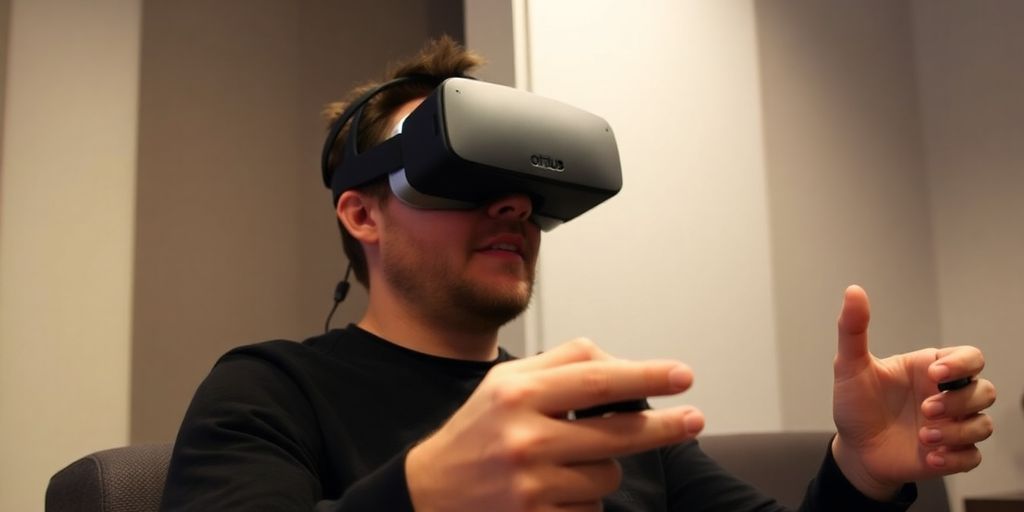
Precision Hand Tracking for Natural Control
Remember when you needed clunky controllers to do anything in VR? Those days are fading fast. Now, we’re seeing headsets with built-in hand tracking. This means you can use your actual hands to interact with the virtual environment. It’s way more intuitive than fumbling with buttons. Think about reaching out and grabbing an object, or making gestures to control menus. It feels so much more natural. The VR headset is a good example of this.
Full-Body Immersion: Beyond the Headset
Hand tracking is cool, but what about the rest of your body? Full-body tracking is the next level of immersion. It involves using external sensors or cameras to track your movements from head to toe. This opens up a whole new world of possibilities, especially for social VR and fitness applications. Imagine dancing with friends in a virtual club, or practicing martial arts with a virtual instructor. It’s all about bringing your whole self into the experience.
Here are some applications:
- Social VR experiences
- Fitness and exercise programs
- Virtual training simulations
Haptic Feedback: Feeling the Virtual World
Seeing and moving is one thing, but what about feeling? Haptic feedback is all about adding the sense of touch to VR. This can range from simple vibrations to more complex sensations like pressure and texture. Imagine feeling the recoil of a virtual gun, or the texture of a virtual fabric. It adds a whole new layer of realism to the experience. Haptic suits and gloves are becoming more common, and they’re really pushing the boundaries of what’s possible.
Haptic feedback is still in its early stages, but it has the potential to revolutionize VR. As the technology improves, we can expect to see even more realistic and immersive experiences. It’s not just about seeing and hearing; it’s about feeling the virtual world around you.
The Power of Processing and Connectivity
Okay, so let’s talk about what makes these VR headsets actually work. It’s not just the screen strapped to your face, right? It’s the brains and the way they connect to everything else. Think of it like this: a super cool display is useless if the computer powering it is a potato. And what good is a powerful computer if it can’t talk to the headset fast enough?
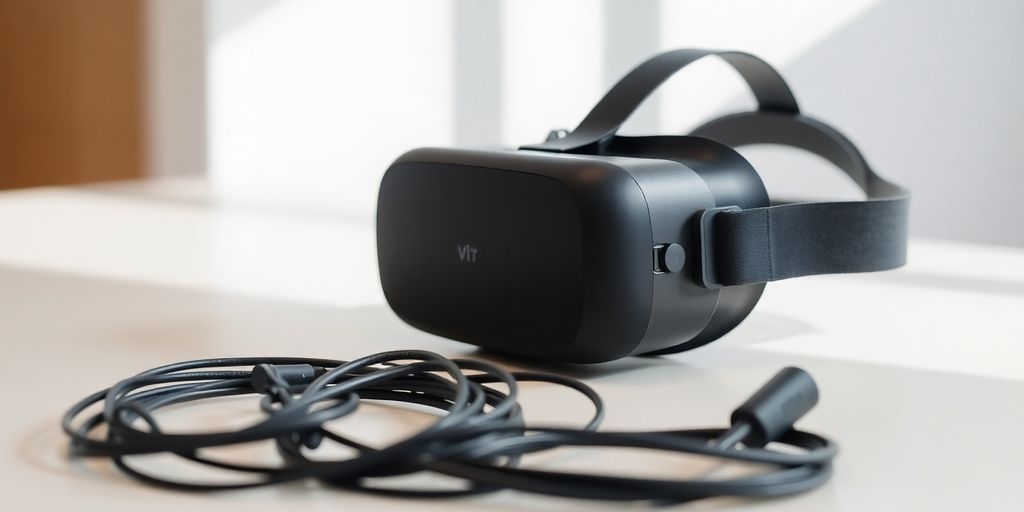
Onboard Computing: Untethered Experiences
Remember when VR meant being tethered to a massive PC with a bunch of cables? Yeah, not ideal. Now, a lot of headsets have their own processors built right in. This means you can move around freely without tripping over wires. It’s a game changer, seriously. The chips inside are getting better and better, so you can play more complex games and run more demanding apps without needing a separate computer. The PICO 4 Ultra is a good example of this.
Cloud VR: Streaming the Future
Imagine playing the most graphically intense VR game without needing a super expensive PC. That’s the promise of Cloud VR. Basically, the game runs on a powerful server somewhere else, and the video is streamed to your headset. It’s like Netflix, but for VR. There are some challenges, though:
- Latency is a big one. If there’s too much lag, the experience will be terrible.
- You need a really good internet connection.
- Security is also a concern. You’re sending a lot of data over the internet.
5G and Beyond: Low Latency Connections
Speaking of internet connections, 5G is supposed to make Cloud VR a lot more viable. It offers much lower latency and higher bandwidth than previous generations of mobile networks. This means less lag and a smoother experience. And it’s not just 5G; we’re already looking at what comes next. The faster and more reliable the connection, the better VR will be. It’s all about making the experience feel as real as possible.
The future of VR hinges on fast, reliable connectivity. Without it, many of the most exciting applications, like cloud-based gaming and remote collaboration, simply won’t be possible. The industry is investing heavily in new technologies to overcome these limitations and bring VR to a wider audience.
Ergonomics and Comfort in Design
Let’s be real, nobody wants a VR headset that feels like a medieval torture device. You want to lose yourself in the virtual world, not be constantly reminded of the plastic contraption strapped to your face. That’s why ergonomics and comfort are super important in VR headset design. It’s not just about looking cool; it’s about being able to actually use the thing for more than 15 minutes without a headache.
Lightweight Materials for Extended Use
Heavy headsets are a no-go. The lighter the headset, the longer you can play or work without neck strain. Manufacturers are experimenting with all sorts of materials to cut down on weight. Think advanced plastics, carbon fiber, and even magnesium alloys. It’s a constant battle to shave off every gram possible. I remember trying one of the early headsets, and it felt like I was wearing a brick! Now, they’re getting much better.
Balanced Weight Distribution for Comfort
It’s not just about the overall weight, but where that weight is located. A headset that’s front-heavy will pull on your face and give you a headache in no time. The goal is to distribute the weight evenly across your head, so it feels balanced and secure. Some headsets achieve this by placing the battery pack at the back, acting as a counterweight. Others use clever internal designs to shift the center of gravity. A well-balanced headset makes a huge difference in comfort.
Customizable Fit for Every User
Heads come in all shapes and sizes, so a one-size-fits-all approach just doesn’t work. A good VR headset needs to be adjustable to accommodate different head sizes and shapes. This usually involves adjustable straps, headbands, and facial interfaces. Some headsets even offer different sized facial interfaces to ensure a snug and comfortable fit. Think about it like shoes – you wouldn’t want to wear shoes that are too big or too small, right? Same goes for VR headsets. For example, an Elite Strap with Battery can make a huge difference.
Comfort is king. If a VR headset isn’t comfortable, people simply won’t use it, no matter how impressive the technology is. Manufacturers are starting to realize this, and they’re putting more and more effort into designing headsets that are comfortable to wear for extended periods.
Here are some key areas where customization helps:
- Adjustable headbands: To fit different head sizes.
- Interchangeable facial interfaces: For different face shapes.
- Adjustable straps: To fine-tune the fit and secure the headset.
- Pupil distance adjustment: To ensure a clear and comfortable image for each eye.
Applications Beyond Gaming and Entertainment
Okay, so everyone thinks VR is just for games, right? Like, you strap on a headset and suddenly you’re shooting zombies or racing cars. And yeah, it’s awesome for that. But honestly, the potential is way bigger than just entertainment. It’s starting to pop up in places you wouldn’t even expect. It’s kind of wild to see where it’s going.
Transforming Education and Training
Forget boring textbooks and lectures. Imagine learning about ancient Rome by actually being in ancient Rome. That’s the kind of stuff VR can do for education. It can make learning way more engaging and memorable. Think about medical students practicing surgery in a virtual operating room, or engineers designing buildings in a 3D environment where they can walk around and see how everything fits together. It’s not just about making things fun; it’s about making them more effective. I think virtual reality is going to change education forever.
- Interactive historical simulations
- Virtual field trips to remote locations
- Hands-on training for complex procedures
Revolutionizing Healthcare and Therapy
VR is already making waves in healthcare. Therapists are using it to treat phobias, PTSD, and even chronic pain. It’s pretty amazing. For example, someone with a fear of heights can gradually expose themselves to virtual heights in a safe and controlled environment. It’s also being used for rehabilitation after strokes or injuries, helping patients regain motor skills and coordination. Plus, surgeons can use VR to plan and practice complex operations before they even touch a real patient. It’s like having a superpower for doctors.
VR offers a safe and controlled environment for patients to confront their fears and anxieties, leading to more effective and lasting therapeutic outcomes. It’s a game-changer for mental health treatment.
Innovating Design and Engineering Workflows
Designers and engineers are starting to use VR to create and test their products in a whole new way. Instead of just looking at 2D drawings on a screen, they can actually step inside their designs and experience them firsthand. This makes it easier to spot potential problems and make changes early on in the process, saving time and money. Imagine architects walking through a virtual building before it’s even built, or car designers sitting in a virtual car to test the ergonomics. It’s like having a crystal ball for design.
| Feature | Traditional Design | VR Design |
|---|---|---|
| Visualization | 2D Drawings | 3D Immersive |
| Prototyping | Physical Models | Virtual Models |
| Collaboration | Meetings | Shared VR Spaces |
Challenges and Future Outlook
Addressing Motion Sickness and Discomfort
Okay, so VR is cool, but let’s be real – motion sickness is a major buzzkill. It’s like, you’re finally getting into the game, and then BAM, your stomach’s doing somersaults. It’s not just a minor thing either; it can seriously limit how long people can actually use VR. The tech folks are trying all sorts of things to fix it, like improving frame rates and reducing latency. But honestly, it’s still a work in progress. Some people are just more prone to it than others, which makes it even harder to solve. I’ve tried ginger candies, wristbands, and even those weird glasses, but nothing seems to work perfectly. Hopefully, they figure out a real solution soon, because it’s holding VR back.
The Path to Mass Adoption and Affordability
VR headsets are still kinda pricey, right? Like, not everyone can just drop a few hundred bucks on one. And even if you can afford the headset, you also need a decent computer to run it, which is another expense. So, affordability is a big hurdle for mass adoption. Plus, there’s the whole
Conclusion
So, what’s the takeaway from all this VR headset talk? It’s pretty clear that these things are changing fast. We’re seeing new stuff all the time, and it just keeps getting better. Think about it: clearer pictures, more comfortable designs, and ways to interact that feel more real. It’s not just for games anymore, either. People are using VR for all sorts of things, like learning new skills or even just hanging out with friends in a virtual space. It’s exciting to imagine where this technology will go next. One thing’s for sure, the future of VR looks pretty cool, and we’re just at the beginning of it all.
Frequently Asked Questions
What exactly are VR headsets?
VR headsets let you step into a computer-made world. They put a screen right in front of your eyes, making it feel like you’re really there. Special lenses make the picture look big and deep, like you’re looking around in a real place.
What can you do with a VR headset?
Lots of things! People use them for playing games, watching movies, and even going on virtual trips. But they’re also super helpful for learning new skills, practicing difficult jobs, and even helping doctors plan surgeries.
Can VR make you feel sick?
Some people feel a bit dizzy or sick when they first use VR, kind of like motion sickness. This usually happens if the picture isn’t smooth or if there’s a delay. Companies are working hard to fix this by making the screens faster and the tracking better.
Are VR headsets comfortable to wear?
Yes, they’re getting much better! Newer headsets are lighter, fit more comfortably, and have clearer screens. They also track your movements more accurately, making the experience feel more real and less like you’re just looking at a screen.
Do I need a super powerful computer to use VR?
Not really. While some VR experiences need you to be connected to a powerful computer, many newer headsets work all by themselves. They have all the necessary parts built right in, so you can just put them on and play.
Is VR going to be a big part of the future?
VR is still pretty new, but it’s growing super fast. As the technology gets better and cheaper, more and more people will likely get them. Imagine learning history by walking through ancient Rome, or trying out a new car design before it’s even built!
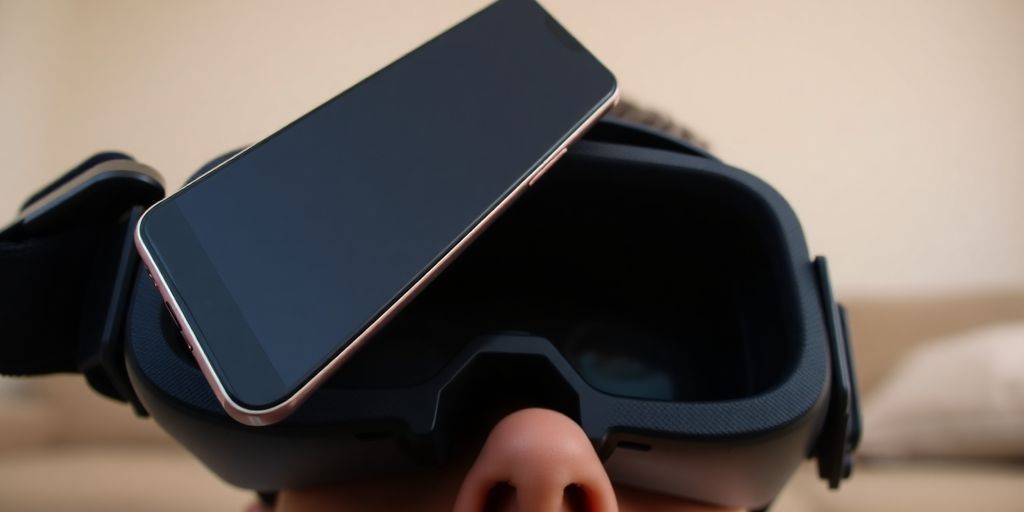
Which Samsung Galaxy Phone Should You Buy for Your Gear VR?

So, you’re thinking about getting a Samsung Gear VR, huh? It’s a pretty cool way to get into virtual reality without spending a ton of money. But here’s the thing: not every Samsung phone works with every Gear VR headset. It can get a little confusing with all the different models out there. This article will help you figure out which Samsung Galaxy phone is the right match for your Gear VR, so you can avoid any headaches and get straight to the fun stuff.
Key Takeaways
- Not all Gear VR headsets are the same; there are ‘Innovator Edition’ models and consumer versions, with slight differences like field of view.
- Newer Galaxy phones, like the S9 and S9 Plus, need specific Gear VR models (like the Note 8 compatible version) to work correctly and prevent damage.
- Older phones, such as the Galaxy S7 and S6 series, have their own compatibility requirements, sometimes needing software updates.
- The physical design of your Galaxy phone matters a lot for Gear VR fit; using the wrong headset can actually harm your phone.
- Always check the Gear VR model number (like SR-325) or look for labels indicating phone compatibility to make sure you have the right one.
Understanding Gear VR Headset Models
It’s easy to get lost in the world of Gear VR headsets. Samsung released several versions over the years, each with slight differences and compatibility quirks. Knowing the models is key to a good VR experience. The Gear VR was a collaboration between Samsung and Oculus, aiming to bring accessible VR to the masses.
Innovator Edition Versus Consumer Models
The first Gear VR headsets were called “Innovator Editions.” Think of them as beta versions. They were aimed at developers and early adopters, not the average consumer. The consumer models came later, refining the design and expanding phone compatibility. The Innovator Editions are rarer now, but it’s good to know the difference. They often had limited software support compared to the later, consumer-focused releases. It’s like the difference between a prototype car and the one you see in the dealership. The consumer models are more polished and ready for everyday use. If you’re looking for a reliable experience, stick with the consumer versions.
Identifying Different Gear VR Versions
Each Gear VR model has a specific model number, usually found on a sticker on the device itself. The color and design also changed slightly between versions. For example, some models are white, while others are black. Some have a trackpad with a distinct design. These visual cues can help you quickly identify which version you have. Here’s a quick rundown of things to look for:
- Model Number: Check the sticker! This is the most reliable way to identify your headset.
- Color: Some models are white, others are black.
- Trackpad Design: The trackpad design changed over time.
It’s important to know which Gear VR model you have because compatibility varies. Using the wrong headset with your phone could lead to a poor experience or even damage your device. Always double-check the model number before connecting your phone.
Field of View Enhancements
One of the key improvements in later Gear VR models was an increased field of view (FOV). The FOV determines how immersive the VR experience feels. A wider FOV fills more of your vision, making you feel more present in the virtual world. The SM-R323 model was one of the first to offer a noticeable increase in FOV. While the difference might seem small on paper, it can make a big difference in how much you enjoy using the top VR and XR devices for gaming and other VR experiences. It’s a subtle but important upgrade.
Compatibility with Newer Galaxy Phones
Galaxy S9 and S9 Plus Considerations
When the Galaxy S9 and S9 Plus came out, things got a little tricky. Samsung made changes to ensure the phones would work with existing Gear VR headsets, but it wasn’t always a perfect fit right out of the box. You might need an adapter or to double-check compatibility lists to be absolutely sure. It’s not a huge deal, but definitely something to keep in mind before you try to jam your shiny new phone into an older headset. The Samsung Galaxy S6 was one of the first phones to work with the Gear VR, so compatibility has come a long way.
The Importance of the Note 8 Compatible Model
The Note 8 was a turning point for Gear VR compatibility. Samsung released a specific Gear VR model designed to accommodate the Note 8’s larger size. This model became important because it also offered better compatibility with other newer phones. If you’re buying a used Gear VR, looking for the Note 8 compatible version is a good idea, even if you don’t own a Note 8. It’s more likely to work well with a wider range of devices. It’s like getting a slightly updated version that just happens to fit more stuff.
Avoiding Damage with Incorrect Headsets
Using the wrong Gear VR model with your phone can actually cause damage. If the phone doesn’t fit properly, you risk scratching the screen or bending the USB-C port. It’s like trying to force a puzzle piece where it doesn’t belong – you might get it in there, but you’ll probably break something in the process. Always double-check that your phone is officially supported by the Gear VR model you’re using. A little caution can save you from a costly repair.
It’s always a good idea to check official compatibility lists on Samsung’s website or in the Oculus app. These lists are regularly updated and will give you the most accurate information about which phones work best with which Gear VR headsets. Don’t rely on guesswork or assumptions; take a few minutes to verify compatibility and protect your phone.
Specific Phone Compatibility Details
Galaxy S7 and S7 Edge Compatibility
The Galaxy S7 and S7 Edge were among the first phones specifically designed to work well with the Gear VR. These phones offer a good balance of performance and screen resolution for a decent VR experience. You shouldn’t have too many issues getting them set up, but make sure your software is up to date. It’s worth noting that while they work, newer phones will give you a better overall experience due to improved processing power and screen tech.
Galaxy S6 Series and Note 5 Requirements
The Galaxy S6, S6 Edge, S6 Edge+, and Note 5 are compatible, but they might need a specific adapter or a slightly older version of the Gear VR. These phones were some of the earliest supported devices, so the experience might not be as smooth as with later models. Keep in mind:
- Performance might be limited compared to newer phones.
- You might need to update the Oculus software.
- Check for overheating issues during extended use.
Using these older phones can still be a fun way to experience VR, but be prepared for some limitations. The technology has come a long way since these phones were released, so don’t expect the same level of immersion or performance you’d get with a newer device.
Android Version Requirements for Gear VR
To use the Gear VR, your phone needs to be running a compatible version of Android. Usually, this means Android 5.0 (Lollipop) or higher. However, it’s always best to check the Gear VR phone compatibility requirements for your specific headset model. If your phone is running an older version of Android, you might need to update it before you can use the Gear VR. Here’s a quick rundown:
- Android 5.0 (Lollipop) is generally the minimum.
- Newer Android versions usually offer better compatibility.
- Check the Oculus app for specific requirements.
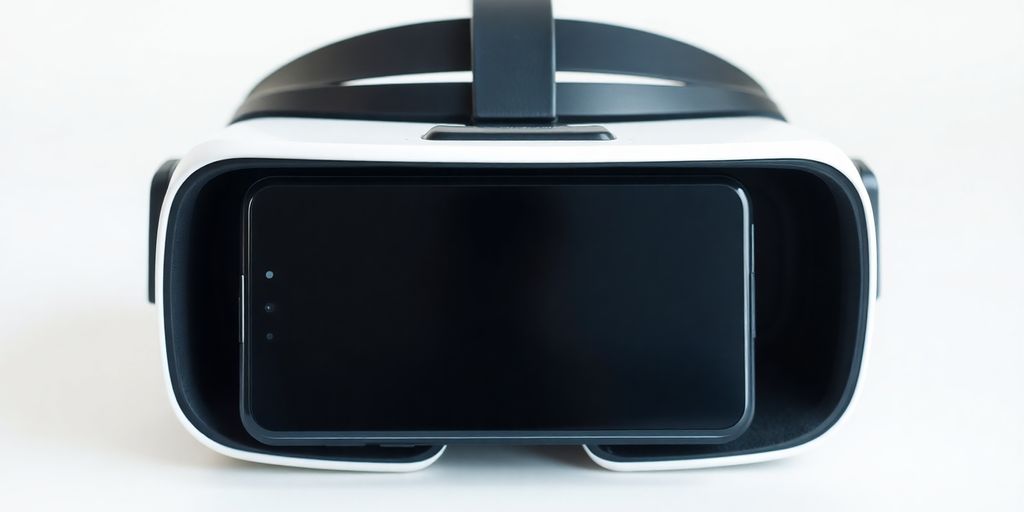
Why Phone Fit Matters for Gear VR
It’s easy to overlook, but getting the right phone to fit correctly in your Gear VR is super important. It’s not just about whether it physically fits; it’s about preventing damage and getting the best possible VR experience. Using the wrong phone can lead to a whole host of problems, from a blurry picture to a broken device.
Design Differences Between Galaxy Models
Samsung’s Galaxy phones come in all shapes and sizes. What worked for the S6 definitely won’t work for the S9, and even less for the newer models. Each Gear VR headset is designed with specific phone dimensions in mind. The internal clips and connectors are precisely placed to align with certain models. Trying to force a phone that’s too big or too small can put stress on both the phone and the headset. This can lead to misalignment of the lenses, causing a blurry or distorted image. It’s like trying to fit a square peg in a round hole – it just doesn’t work. The phone dimensions are crucial for optimal VR experience.
Preventing Phone Damage with Proper Fit
Using the wrong Gear VR with your phone can actually damage your device. The connectors inside the headset are designed to mate perfectly with the phone’s ports. If the fit isn’t right, you could bend or break the charging port or headphone jack. I remember trying to use an older Gear VR with my Note 9, and it was a disaster. The phone kept disconnecting, and I was worried I’d damage the USB-C port. It’s really not worth the risk.
Here’s a quick list of potential damage:
- Bent or broken charging port
- Damaged headphone jack
- Scratches on the phone’s screen or body
- Overheating due to improper ventilation
It’s always better to double-check compatibility before jamming your phone into a Gear VR. A little research can save you a lot of headaches (and money) in the long run.
Samsung’s Recommendations for Optimal Use
Samsung provides clear guidelines on which phones are compatible with each Gear VR model. They even have labels and model numbers to help you identify the right headset. It’s always best to follow their recommendations to ensure the best and safest VR experience. Ignoring these recommendations can lead to a subpar experience or, worse, damage to your phone or headset. Think of it like this: Samsung knows their products best, so it makes sense to listen to their advice. They want you to have a good experience, and that starts with using the right equipment. So, take a minute to check the Gear VR compatibility list before you dive in.
Identifying the Correct Gear VR Model
It’s super important to grab the right Gear VR model to avoid any headaches. Trust me, you don’t want to jam your phone into a headset it wasn’t designed for. Let’s break down how to tell them apart.
Looking for the Note 8 Compatible Label
Okay, so the easiest way to spot the Note 8 compatible Gear VR is to look for the label. Seriously, Samsung made it pretty obvious. If you’re buying used, make sure the seller includes a picture of the box or the headset itself showing that label. It’ll save you a lot of trouble.
Understanding Gear VR Model Numbers
Model numbers are your friend! Here’s a quick rundown of some common ones:
- SM-R320: This is the Innovator Edition. It’s white and has a completely flat trackpad.
- SM-R322: This one is white too, but the trackpad has grooves and a raised circle in the center. The model number is on a label at the bottom.
- SM-R323: This is the black version, also known as ‘CV1.1’. The model number is printed in tiny font near the lenses.
- SM-R324: Another black model (‘CV1.3 with Controller’), with the model number printed near the lenses. It includes both Micro-USB and USB-C adapters and a Gear VR Controller.
- SM-R325: Similar to the SM-R324, this is also a black model (‘CV1.4 with Controller’) with the model number near the lenses, Micro-USB and USB-C adapters, and a Gear VR Controller.
It’s worth noting that some older models might need software updates to work properly with newer phones. Always check the compatibility list on Samsung’s website before buying.
The Significance of Model SR-325
The SR-325 model is significant because it’s one of the later versions that includes the Gear VR controller. This controller really does improve the VR experience, making it more immersive and interactive. Plus, it supports a wide range of Galaxy phones, making it a solid choice if you’re not sure which headset to get. If you can find one at a good price, it’s definitely worth considering.
Here’s a quick table summarizing the key differences:
| Model Number | Color | Trackpad Features | Controller Included | Notes |
|---|---|---|---|---|
| SM-R320 | White | Flat | No | Innovator Edition |
| SM-R322 | White | Grooved | No | |
| SM-R323 | Black | N/A | No | |
| SM-R324 | Black | N/A | Yes | Includes USB-C adapter |
| SM-R325 | Black | N/A | Yes | Includes USB-C adapter, later version |
Gear VR Controller Support
Controller Inclusion with Headsets
Okay, so let’s talk about the Gear VR controller. Some Gear VR headsets actually came with a controller right in the box, which was a nice bonus. It really depended on the model you bought. For example, the SM-R324 and SM-R325 models, often called ‘CV1.3’ and ‘CV1.4’, included a controller. These are usually black. But older versions, like the Innovator Edition, didn’t always include one. It’s something to keep in mind when you’re shopping around. Knowing whether a controller is included can affect the overall cost and your immediate VR experience.
Separate Purchase of Gear VR Controller
If your Gear VR didn’t come with a controller, don’t worry, you could always buy one separately. They were sold as standalone accessories. This was pretty common, especially if you had an older headset. The good thing is that the controllers are generally compatible across different Gear VR models, so you weren’t necessarily locked into a specific version. Just make sure it’s a genuine Gear VR controller to avoid any compatibility issues. You might even find some used ones floating around online for a decent price. It’s worth checking out if you want to enhance the VR experience without breaking the bank.
Enhancing the VR Experience with a Controller
Using a controller with the Gear VR makes a huge difference. It’s not just a small upgrade; it really changes how you interact with the VR world. Here’s why:
- More Immersive Interaction: Instead of just using head movements or the touchpad on the headset, you can point, click, and interact with objects in a more natural way.
- Improved Game Play: Games become way more engaging when you have a controller. Think about aiming in a shooter game or swinging a sword – it’s just better with a physical controller.
- Easier Navigation: Navigating menus and apps is also much easier with a controller. It’s faster and more precise than using the touchpad alone.
The Gear VR controller significantly improves the overall VR experience by offering more intuitive and precise control. It allows for deeper immersion and more engaging interactions within virtual environments, making it a worthwhile addition for any Gear VR user.
The Evolution of Gear VR Compatibility
Increased Phone Compatibility Over Time
Initially, the Gear VR had pretty limited phone compatibility. It was a bit of a pain, honestly. You had to make sure you had exactly the right phone, or it just wouldn’t work. Over time, though, Samsung expanded the range of phones that could be used with the Gear VR. This was a huge improvement because it meant more people could actually use the headset without having to upgrade their phone immediately. The later models were largely identical, but with greater phone compatibility over time.
Software Updates for Older Galaxy Phones
It wasn’t just new Gear VR models that helped with compatibility. Software updates also played a big role. Samsung pushed out updates to some of its older Galaxy phones to make them compatible with newer versions of the Gear VR. This was great for people who didn’t want to buy a new phone and a new headset. It’s always nice when companies support their older products, right?
Here’s a quick rundown of how software updates helped:
- Enabled compatibility with newer Gear VR features.
- Improved performance and stability within VR.
- Fixed bugs and glitches that arose with older phone models.
Samsung and Oculus Collaboration
The Gear VR was a joint effort between Samsung and Oculus, and this partnership was key to its success and evolution. Oculus handled the software side of things, providing the platform and content, while Samsung took care of the hardware. This collaboration allowed for continuous improvements and updates to both the headset and the software, ultimately leading to better compatibility across different Galaxy phones. It was a pretty smart move, if you ask me.
The collaboration between Samsung and Oculus was a game-changer for mobile VR. By combining Samsung’s hardware expertise with Oculus’s software prowess, they created a VR experience that was accessible to a wide audience. This partnership set the stage for future advancements in the field of virtual reality.
Picking Your Gear VR Phone: A Quick Rundown
So, figuring out which Samsung Galaxy phone works with your Gear VR can feel a bit like a puzzle, right? It’s not always super straightforward, especially with all the different models out there. The big thing to remember is that not every Galaxy phone plays nice with every Gear VR headset. You really need to check the specific model numbers for both your phone and the headset to make sure they’re a match. Otherwise, you might end up with something that just doesn’t fit or won’t connect properly. It’s a bit of a hassle, but taking that extra minute to double-check compatibility will save you a lot of frustration in the long run. Happy VR-ing!
Frequently Asked Questions
What is the Samsung Gear VR headset?
Samsung and Oculus worked together to make the Gear VR headset. It’s one of the best ways to experience virtual reality on a mobile phone. Over time, different versions of the headset have come out, each working with specific Samsung phones. This guide helps you figure out which Samsung phones are compatible with Gear VR and how to tell the different headset models apart.
How many versions of the Gear VR are there?
There have been six different versions of the Samsung Gear VR headset released so far. The first two were called ‘Innovator Edition,’ which were like early test versions. After that, proper consumer models came out. They mostly look the same, but newer ones offer a slightly wider view. Also, newer headsets tend to work with more types of phones.
Are the Galaxy S9 and S9 Plus compatible with Gear VR?
Yes, the Galaxy S9 and S9 Plus can work with the Gear VR. However, it’s very important that you use the specific Gear VR model that was released in September 2017, which was designed for the Note 8. Using an older Gear VR model, even one made for the S8, could damage your S9 or S9 Plus because their designs are slightly different.
Why is it important to use the right Gear VR model for my phone?
To avoid damaging your phone, it’s crucial to use the correct Gear VR headset. Samsung designed different headsets to fit different phone models perfectly. If a phone doesn’t fit right, it could get scratched or even break. Always check Samsung’s recommendations to ensure you’re using the right headset for your specific Galaxy phone.
How can I tell which Gear VR model I have?
To identify the correct Gear VR model, look for a label that says ‘Note 8-compatible.’ You can also check the model number. The model number you should look for is SR-325. This number usually helps you confirm if you have the right headset for newer Galaxy phones.
Do all Gear VR headsets come with a controller?
The Gear VR controller greatly improves the virtual reality experience by allowing you to interact more easily with games and apps. Some Gear VR headsets might come with a controller, but if yours doesn’t, you can often buy one separately. Having a controller makes navigating VR worlds much more fun and intuitive.
Unveiling the Future: A Deep Dive into VR Headsets

Hey there! So, virtual reality headsets, right? They’ve really come a long way. What used to be something out of a sci-fi movie is now, like, pretty common. We’re going to take a good look at how these things got started, what makes them tick now, and where they might be headed. It’s all about checking out the cool tech and what it means for us. You can find more info at http://vrheadsets3d.com:80/?p=1484.
Key Takeaways
- VR tech has grown from a niche item to something many people use, thanks to big jumps in how it’s made and how powerful computers got.
- New screens and ways to show images make VR look way better and help stop people from feeling sick when they use it.
- How VR tracks your movement and lets you interact with virtual stuff has gotten super good, making experiences feel more real.
- VR isn’t just for games anymore; it’s changing how we learn, work, and even watch movies.
- Even with all the cool stuff, there are still things to figure out, like making VR cheaper and more comfortable for everyone.
The Evolution of Virtual Reality Technology
From Niche Gadget to Mainstream Appeal
VR’s journey is pretty wild, right? It started as this super-expensive, clunky thing that only researchers and hardcore gamers cared about. Now, you see VR headsets everywhere – at your friend’s house, at the mall, even in schools. The shift from a niche gadget to something more mainstream is due to a few things: better tech, lower prices, and more interesting stuff to do in VR.
- Early VR was mostly for specialized applications, like flight simulators.
- The consumer VR market really took off with headsets like the Oculus Rift and HTC Vive.
- Now, standalone headsets like the Meta Quest are making VR even more accessible.
It’s interesting to think about how VR has changed. Back in the day, it was all about the hardware. Now, it’s just as much about the software and the experiences you can have. That’s what’s driving adoption, I think.
Key Milestones in VR Headset Development
There have been some big moments that really pushed VR forward. I’m talking about things like improved display resolution, better tracking, and more comfortable designs. Each of these milestones made VR a little bit more appealing to the average person. Let’s take a look at some of them:
| Milestone | Impact |
|---|---|
| Wide Field of View | More immersive experience, reducing the feeling of looking through binoculars. |
| Positional Tracking | Allowed users to move around in virtual space, increasing realism. |
| Wireless VR | Freed users from cables, improving mobility and ease of use. |
It’s easy to forget how far virtual reality’s history has come in such a short time.
The Impact of Processing Power on Immersion
Processing power is everything when it comes to VR. If your computer or headset can’t handle the graphics and calculations, you’re going to have a bad time. Think lag, low resolution, and a general feeling of disconnect. As processors get faster and more efficient, VR experiences become way more immersive. This means smoother gameplay, more detailed environments, and more realistic interactions. It’s a constant cycle of improvement – better processors lead to better VR, which leads to more demand for even better processors.
- Faster processors allow for higher resolution displays.
- Improved processing reduces latency, minimizing motion sickness.
- More powerful chips enable more complex and realistic simulations.
Cutting-Edge Display Technologies
High-Resolution Panels and Pixel Density
VR headsets are all about tricking your brain into thinking you’re somewhere else, and a big part of that is the display. The higher the resolution, the more believable the illusion. We’re talking about cramming as many pixels as possible into a small space right in front of your eyes. Think about it: if you can see the individual pixels, it breaks the immersion. So, manufacturers are constantly pushing the limits of what’s possible with these tiny panels. It’s not just about resolution numbers, though; it’s about pixel density, measured in pixels per degree (PPD). The higher the PPD, the sharper the image appears.
The Role of OLED and LCD in VR Displays
OLED and LCD are the two main types of displays you’ll find in VR headsets, and they each have their pros and cons. OLEDs are known for their incredible contrast ratios and deep blacks because each pixel can be turned off completely. This makes for a more vibrant and realistic image. LCDs, on the other hand, are generally brighter and can be cheaper to produce. However, they often struggle with contrast and can exhibit a “screen door effect” where you can see the gaps between pixels. Some manufacturers are using clever techniques like fast-switching LCDs and mini-LED backlights to improve LCD performance, but OLED still tends to be the preferred choice for high-end VR.
Addressing Motion Sickness with Refresh Rates
Motion sickness is a real problem for some VR users, and one of the key factors is the refresh rate of the display. Refresh rate is how many times per second the image on the screen is updated, measured in Hertz (Hz). A higher refresh rate means less latency between your head movements and what you see in the headset, which can help reduce motion sickness. Most modern VR headsets aim for at least 90Hz, and some are even pushing 120Hz or higher. It’s not just about the refresh rate of the display itself, though; the entire system needs to be able to keep up, including the graphics card and the tracking system. If there’s any lag, it can throw off your brain and make you feel queasy. Pimax recently launched an affordable, SLAM-tracked Micro-OLED VR headset that addresses this issue.
High refresh rates are important, but they’re not the only factor in preventing motion sickness. Other things like the quality of the tracking, the field of view, and even the content itself can play a role. Some people are more susceptible to motion sickness than others, so it’s something that VR developers need to be mindful of.
Here’s a quick comparison of OLED and LCD:
| Feature | OLED | LCD |
|---|---|---|
| Contrast Ratio | Excellent | Good (improving with new tech) |
| Black Levels | Deep Blacks | Can be greyish |
| Brightness | Good | Excellent |
| Response Time | Very Fast | Fast (but can be slower than OLED) |
| Cost | Generally More Expensive | Generally Less Expensive |
| Screen Door Effect | Minimal | Can be noticeable |
And here are some things to consider when thinking about refresh rates:
- Higher refresh rates generally reduce motion sickness.
- The entire system needs to support the high refresh rate.
- Content needs to be optimized for high refresh rates.
- Individual sensitivity to motion sickness varies.
Advanced Tracking and Interaction
VR isn’t just about what you see; it’s about how you interact with what you see. The tech that lets you reach out and touch (virtually, of course) is getting seriously impressive. It’s what separates a cool demo from a truly immersive experience. Let’s look at how VR knows where you are and what you’re doing.
Inside-Out Versus Outside-In Tracking Systems
Okay, so there are basically two main ways VR headsets figure out where you are in space. Inside-out tracking uses cameras on the headset itself to map the environment. Think of it like the headset is constantly looking around and saying, “Okay, I’m here, and that wall is there.” Outside-in tracking, on the other hand, uses external sensors, like base stations, that watch the headset. It’s like having a bunch of referees constantly monitoring your position. Each has its pros and cons. Inside-out is generally easier to set up since you don’t need to mount anything, but outside-in can be more accurate, especially for large play spaces.
Haptic Feedback and Immersive Controllers
Controllers are your hands in the virtual world, but they’re getting way more sophisticated than just buttons and joysticks. Haptic feedback is a big deal. It’s what lets you “feel” things. Imagine grabbing a virtual sword and actually feeling the weight and resistance. That’s haptics at work. Some controllers even have finger tracking, so the VR world can see your individual finger movements. This makes interactions way more natural.
Eye Tracking for Enhanced User Experience
Eye tracking is exactly what it sounds like: the headset tracks where your eyes are looking. This opens up a bunch of possibilities. For one, it can be used for foveated rendering, where only the area you’re looking at is rendered in high detail, saving processing power. It can also be used for more natural interactions. Imagine making eye contact with a virtual character, and they react accordingly. It makes the experience feel much more real. It also helps with accessibility, allowing users to navigate menus and interact with the environment using only their eyes. The best VR and XR devices are starting to incorporate this.
Hand Tracking and Gesture Recognition
Forget controllers altogether! Hand tracking lets you use your bare hands in VR. The headset uses cameras to see your hands and interpret your gestures. This is still a relatively new technology, but it’s improving rapidly. Imagine reaching out and grabbing a virtual object, or making a fist to punch something. It’s incredibly intuitive and immersive. Gesture recognition takes it a step further, allowing you to perform specific actions with hand gestures.
The future of VR interaction is all about making the virtual world feel as real and natural as possible. The more seamless the interaction, the more immersive the experience. It’s about removing the barriers between you and the digital world, so you can truly feel like you’re there.
Here’s a quick comparison of tracking methods:
| Feature | Inside-Out Tracking | Outside-In Tracking |
|---|---|---|
| Setup | Easier, no external sensors | More complex, requires base stations |
| Accuracy | Good, improving rapidly | Generally more accurate, especially for large spaces |
| Cost | Typically lower | Can be more expensive |
| Portability | More portable | Less portable |
And here are some benefits of hand tracking:
- More intuitive interactions
- Increased immersion
- No need for controllers
- Potential for new types of VR experiences
The Future of VR Content and Applications
VR isn’t just about cool tech; it’s about what you do with it. And that’s where the content and applications come in. It’s not just gaming, though that’s a big part. Think education, work, entertainment – VR is poised to change a lot. The possibilities are pretty wild, honestly.
Gaming Beyond Traditional Boundaries
VR gaming is already pretty neat, but it’s going to get way more immersive. Imagine games where you’re not just controlling a character, but are the character. We’re talking full-body tracking, haptic suits, the works. It’s not just about better graphics; it’s about a whole new level of presence.
- More realistic physics and interactions.
- Multiplayer experiences that feel truly social.
- New genres that are only possible in VR.
Transforming Education and Training
Forget textbooks; imagine learning history by walking through ancient Rome. VR can make education way more engaging. And for training, like surgeons practicing complex procedures, it’s a game-changer. No risk, just pure learning. It’s a safe and effective way to gain experience. The future of VR is bright.
- Interactive lessons that adapt to your pace.
- Simulations of real-world scenarios.
- Access to educational experiences from anywhere.
Virtual Collaboration in the Workplace
Zoom meetings are okay, but VR could make remote work feel way more connected. Imagine a virtual office where you can actually interact with your colleagues, brainstorm on a whiteboard, and feel like you’re in the same room. It could make remote work less isolating and more productive.
VR collaboration tools could significantly reduce the need for physical office space, leading to cost savings and a smaller environmental footprint. It’s not just about convenience; it’s about sustainability.
New Frontiers in Entertainment
Beyond gaming, VR is opening up new possibilities for entertainment. Think concerts where you’re on stage with your favorite band, movies where you’re in the story, and virtual travel to places you’ve only dreamed of. It’s about creating experiences that are more immersive and engaging than anything we’ve seen before. The possibilities are endless. Here’s a quick look at some potential entertainment applications:
| Application | Description |
|---|---|
| Virtual Concerts | Experience live music from anywhere in the world, with interactive elements. |
| Immersive Storytelling | Become a character in a movie or TV show, influencing the plot. |
| Virtual Tourism | Explore historical sites and exotic locations without leaving your home. |
Challenges and Opportunities in VR Adoption
Overcoming Hardware Costs and Accessibility
Okay, let’s be real, VR headsets can be expensive. Like, really expensive. That’s a huge barrier for a lot of people. It’s not just the headset itself, but also the powerful computer you might need to run it. Lowering the cost of entry is key to getting VR into more homes. It’s not just about price, though. Accessibility is also a big deal. We need to make sure VR is usable for people with disabilities. That means thinking about things like motion controls, visual impairments, and even motion sickness.
The Importance of Content Ecosystems
Hardware is only half the battle. You need good content to make people want to use VR. Think about it: would you buy a game console if there were no games to play? Probably not. The same goes for VR. We need a thriving ecosystem of games, experiences, and applications. And it’s not just about quantity, it’s about quality. People want engaging, immersive content that’s worth their time and money. A strong content ecosystem is vital for long-term success.
Addressing User Comfort and Ergonomics
Let’s talk comfort. Strapping a brick to your face isn’t exactly a pleasant experience. VR headsets can be bulky, heavy, and uncomfortable to wear for extended periods. Ergonomics are super important. We need to design headsets that are lightweight, adjustable, and distribute weight evenly. And it’s not just about the headset itself. Things like motion sickness can also impact comfort. Developers need to be mindful of this and design experiences that minimize nausea.
VR has the potential to change how we work, play, and learn. But we need to address these challenges to make it a reality for everyone. It’s not just about the technology, it’s about the user experience. If we can make VR affordable, accessible, and comfortable, then the possibilities are endless.
Here are some things that would help:
- More affordable headsets
- Better content
- Improved ergonomics
Comparing Leading VR Headsets
Standalone Versus PC-Tethered Devices
Okay, so when you’re looking at VR headsets, one of the first big choices is whether to go standalone or PC-tethered. Standalone headsets, like the Meta Quest 3, are all-in-one. Everything is built right into the headset – the processor, the battery, the storage. That means no wires! You can just pick it up and start playing. PC-tethered headsets, on the other hand, need to be connected to a powerful computer to work. This usually means better graphics and more complex games, but you’re stuck with a cable.
- Standalone: Easy to use, portable, less powerful.
- PC-Tethered: Higher performance, requires a powerful PC, more immersive experiences.
- Hybrid: Some headsets can do both, offering flexibility.
Key Specifications and Performance Metrics
When comparing VR headsets, there are a few key specs you should pay attention to. Resolution is a big one – higher resolution means a sharper, clearer image. Refresh rate is also important; a higher refresh rate (like 90Hz or 120Hz) can reduce motion sickness. Field of view (FOV) determines how much of the virtual world you can see at once. And, of course, tracking accuracy is crucial for a good experience. Here’s a quick rundown:
| Specification | Why It Matters |
|---|---|
| Resolution | Image clarity and sharpness |
| Refresh Rate | Reduces motion sickness, smoother visuals |
| Field of View | How much you can see in the virtual world |
| Tracking | Accuracy of movement in the virtual environment |
| Weight | Comfort during extended use |
User Reviews and Real-World Performance
Specs are one thing, but what do people actually think of these headsets after using them for a while? User reviews can give you a good sense of the pros and cons of each device. Look for comments about comfort, ease of use, and the quality of the VR experience. Also, pay attention to any recurring issues or complaints. Some headsets might have great specs on paper but suffer from poor tracking or uncomfortable designs in real-world use. It’s always a good idea to watch some video reviews too, to see the headsets in action.
It’s important to remember that everyone’s experience with VR is different. What one person finds comfortable, another might not. Read a variety of reviews and try to get a sense of the overall consensus before making a decision.
The Metaverse and Its VR Foundation

The metaverse. It’s the buzzword that won’t go away, right? But what does it actually mean, especially when we’re talking about VR? It’s more than just a game or a fancy tech demo. It’s about creating persistent, shared virtual spaces, and VR headsets are shaping up to be a key way to access them.
Building Interconnected Virtual Worlds
Think of the internet, but instead of just browsing websites, you’re in them. That’s the basic idea. The metaverse aims to create interconnected virtual worlds where users can interact, work, play, and even own property. It’s not just one single platform, but a network of different experiences that (ideally) connect with each other. VR headsets are a natural fit for this, because they provide the immersive experience needed to really feel like you’re there.
- Creating shared standards for avatars and virtual assets.
- Developing tools for world-building and content creation.
- Addressing issues of interoperability between different platforms.
Economic Models Within the Metaverse
Okay, so you’re in this virtual world. What can you do? Well, a big part of the metaverse concept is the idea of a virtual economy. This means buying, selling, and trading digital assets, using cryptocurrencies or other forms of digital money. Imagine buying a virtual house, designing clothes for your avatar, or even starting a virtual business. It sounds wild, but it’s already happening. The metaverse and virtual reality are being used for advanced education.
The potential for new economic models within the metaverse is huge. It could create new jobs, new industries, and new ways for people to earn a living. But it also raises questions about regulation, ownership, and the value of digital assets.
Social Interaction in Digital Spaces
Ultimately, the metaverse is about people. It’s about creating spaces where people can connect, collaborate, and build communities. VR headsets can make these interactions feel more real and engaging. Imagine attending a virtual concert with friends, collaborating on a project with colleagues from around the world, or simply hanging out in a virtual coffee shop. The possibilities are pretty endless. Social interaction in digital spaces is a key component of the metaverse.
- Developing realistic and expressive avatars.
- Creating tools for communication and collaboration.
- Addressing issues of privacy and safety in virtual environments.
Conclusion
So, we’ve talked a lot about VR headsets and where things are headed. It’s pretty clear this tech is still growing, and it’s getting better all the time. Think about it: what started as something for hardcore gamers is now showing up in all sorts of places, from schools to doctor’s offices. The future looks really interesting for VR, and it’ll be cool to see how it keeps changing our world. It’s not just a fad; it’s something that’s here to stay and will probably surprise us with what it can do next.
Frequently Asked Questions
What exactly do VR headsets do?
VR headsets let you step into make-believe worlds. They put screens right in front of your eyes, making you feel like you’re really there. Special sensors track your head movements, so when you look around in real life, you also look around in the game or virtual space.
Are there different kinds of VR headsets?
Some VR headsets need to be plugged into a powerful computer to work. These are called PC-tethered. Others, known as standalone headsets, work all by themselves, kind of like a smartphone. They have everything they need built right in, so you can take them anywhere.
What are the main things people use VR for?
People use VR for lots of things! Many play games that feel super real. But it’s also used for learning, like practicing surgery or exploring ancient ruins. Some folks even use it to meet up with friends or coworkers in virtual rooms.
Can VR make you feel sick?
VR can sometimes make you feel a little dizzy or sick, especially when you first start using it. This usually happens if the picture isn’t smooth or if there’s a delay. Most new headsets are much better at preventing this feeling.
How much do VR headsets usually cost?
The price of VR headsets can really change. Some basic ones might cost a few hundred dollars, while the really fancy ones with all the latest tech can be over a thousand. It often depends on how powerful they are and what features they have.
What’s the connection between VR and the ‘metaverse’?
The ‘metaverse’ is like a huge online world where people can hang out, play, work, and shop, all in a virtual space. VR headsets are a key way to get into the metaverse and experience it in a really immersive way, making you feel like you’re actually there.
Getting Started with Your Oculus Rift DK2: A Comprehensive Setup Guide

So, you just got your hands on an Oculus Rift DK2? Awesome! Getting this cool piece of tech up and running might seem a little tricky at first, but don’t worry, it’s totally doable. This guide will walk you through everything, from the moment you open the box to launching your first virtual world. We’ll cover all the important steps to make sure your DK2 experience is smooth and fun. Let’s get started!
Key Takeaways
- Always check the box to make sure all parts are there and read the safety stuff first.
- You’ll need to download the Oculus software, especially the Runtime, to get things going.
- Setting up the display is a big deal; you’ll want to make the Oculus your main screen and adjust its settings.
- Hooking up the cables correctly and making sure the sensors are clear is super important for the headset to work.
- For Mac users, paying attention to your graphics card and how you manage other monitors can really help with performance.
Unboxing Your Oculus Rift DK2
Alright, so you’ve finally got your hands on the Oculus Rift DK2! Exciting times ahead. Let’s get this thing unboxed and ready to go. It’s not rocket science, but a little care goes a long way.
Carefully Remove Contents
First things first, find a good, clear workspace. You don’t want to be fumbling around with expensive tech on a cluttered desk. Open the box carefully. No need to go all Hulk on it. Gently lift out each component, taking note of how it’s packed. This is useful if you ever need to repack it for storage or transport. Be mindful of static electricity, especially if you’re in a dry environment. Maybe touch a grounded metal object before you start handling the electronics.
Verify All Items Are Present
Okay, now for the checklist. Make sure you have everything that’s supposed to be in the box. This usually includes:
- The Oculus Rift DK2 headset itself
- A cable to connect the headset to your computer
- The external camera for positional tracking
- A power adapter for the camera
- Different lenses (A, B, C) to adjust for your vision
If anything is missing, don’t panic! Contact Oculus support. They’re usually pretty good about sorting things out. It’s better to catch it now than halfway through the setup process. Also, it’s a good idea to keep the box and packaging materials for a while, just in case you need to return or exchange anything. If you are having issues with the frame rate, you may need to use adb commands.
Review Safety Warnings
Seriously, don’t skip this step. I know, reading manuals is boring, but those safety warnings are there for a reason. They’ll tell you about potential risks, like motion sickness, eye strain, and even seizures in rare cases. Pay attention to the recommended usage guidelines and take breaks often. Your eyes (and your brain) will thank you. Plus, there might be important info about cleaning and maintaining the headset to keep it in good condition.
It’s easy to get caught up in the excitement of VR, but remember to be responsible. Don’t use the headset while driving, operating heavy machinery, or doing anything else that requires your full attention. And if you start feeling unwell, stop immediately. VR is awesome, but safety comes first.
Essential Software Installation
Alright, let’s get the software side of things sorted out. You can’t just plug in the DK2 and expect magic to happen. You’ll need to install some software to make it work correctly. It’s not too bad, I promise!
Download Oculus Runtime
First things first, you absolutely need the Oculus Runtime. This is the core software that allows your computer to communicate with the DK2. Think of it as the driver for your VR headset. You’ll want to head over to the Oculus developer website (or an archive if you’re doing this in the future, since Oculus doesn’t officially support the DK2 anymore) and find the appropriate runtime version for the DK2. Make sure you get the right one, or things might not work as expected. Once you’ve found it, download the installer. It’s usually a pretty big file, so grab a coffee while you wait.
Install the Software Development Kit
Next up is the Software Development Kit, or SDK. This isn’t strictly required for running existing VR experiences, but it’s super helpful, especially if you plan on doing any kind of development or advanced configuration. The SDK includes tools and libraries that developers use to create VR applications. Even if you’re not a developer, it often comes with useful utilities and examples. The installation process is pretty straightforward; just run the installer you downloaded and follow the prompts. Make sure to pay attention to where it installs, as you might need to access those files later. You might need to find an archived version of the Oculus SDK online, since the DK2 is an older piece of tech.
Explore Initial Demos
Okay, you’ve got the runtime and SDK installed. Now for the fun part: trying out some demos! The Oculus SDK usually comes with a few basic demos to get you started. These are simple VR experiences designed to show off the capabilities of the DK2. Look for them in the installation directory of the SDK. Running these demos is a great way to verify that everything is working correctly and to get a feel for what VR is all about. If the demos run smoothly, you’re in good shape. If not, it’s time to do some troubleshooting. Here are some demos you might find:
- Oculus World Demo
- Tuscany Demo
- VR Cinema
Getting the software set up correctly is half the battle. Don’t skip steps or rush through the installation process. A little patience now will save you a lot of headaches later. If you run into any problems, the Oculus developer forums (or archived versions of them) are a great resource for finding solutions. Good luck, and have fun exploring the world of VR!
Configuring Display Preferences
This part is important. Getting your display settings right can make or break your VR experience with the DK2. It’s not always plug-and-play, so let’s walk through the key steps.
Set Oculus as Main Display
Sometimes, the Oculus isn’t automatically recognized as the primary display. You might need to manually set it in your operating system’s display settings. This ensures that VR applications render correctly on the headset. If you don’t, you might see the VR view on your monitor instead of inside the headset, which isn’t what we want. I’ve had this happen to me a few times, and it’s always a facepalm moment when I realize I forgot this step.
Utilize Oculus Config Utility
The Oculus Configuration Utility is your friend. It allows you to fine-tune various settings, including display mode and IPD (Inter-Pupillary Distance). Make sure you download the Oculus runtime for the DK2.
Here’s what you can adjust:
- Display Mode: Choose between Direct and Extended mode. Direct mode generally offers better performance and compatibility.
- IPD: Adjust this to match the distance between your pupils for a clearer image. A wrong IPD can cause eye strain and a blurry picture.
- Firmware Updates: Keep your DK2 firmware up to date for the best experience.
It’s worth spending some time experimenting with these settings to find what works best for you. Everyone’s eyes are different, and the ideal configuration can vary.
Adjust Resolution and Rotation
Getting the resolution right is key for a sharp VR image. The DK2 has a specific native resolution, and running it at a different resolution can lead to distortion or performance issues. Also, make sure the rotation is set correctly so the image isn’t upside down or sideways. I remember one time I forgot to set the rotation, and everything was tilted – it was a very disorienting experience!
Here’s a quick guide:
- Check Native Resolution: Find the DK2’s native resolution (usually 1920×1080 per eye).
- Set Resolution: In the Oculus Configuration Utility or your graphics card control panel, set the resolution to match the native resolution.
- Adjust Rotation: If the image is rotated, use the utility to correct it. Common settings are 0, 90, 180, and 270 degrees.
Headset Physical Setup
Alright, let’s get the DK2 physically set up. This part is all about making sure everything is connected right and that the headset is comfortable. It’s not rocket science, but a few key things can make a big difference in your VR experience.
Secure Cable Connections
First things first, let’s talk cables. The DK2 has a few different connections that all need to be snug and secure. You’ve got the HDMI cable for video, the USB cable for data, and the power adapter (if you want to use the USB accessory port on the headset). Make sure each of these is firmly plugged into both the headset and your computer. A loose connection can cause all sorts of weird issues, from video dropouts to tracking problems. I usually give them a little wiggle test after plugging them in, just to be sure. Also, make sure the cable has enough slack so you can move around without pulling on the connections. You don’t want to accidentally yank something out mid-game!
Ensure Clear LED Sensors
The DK2 uses external sensors to track your head movement, so it’s important to make sure these sensors have a clear line of sight to the headset. This means no obstructions! Keep the area in front of the sensors clear of anything that might block the signal. Things like books, toys, or even just a messy desk can interfere with tracking. I like to position the sensor about 5 feet away from where I’ll be standing or sitting, right in front of me. This seems to give the best results. Also, make sure the sensor is stable and won’t get bumped or moved during use. A wobbly sensor is a recipe for a shaky VR experience.
Proper Lens Selection
The DK2 comes with two sets of lenses, designed for different levels of nearsightedness. The ‘A’ set is for moderately nearsighted or normal vision, while the ‘B’ set is for very nearsighted users. The A set comes pre-installed. If you wear glasses, stick with the ‘A’ lenses and adjust the side screws on the headset to create more room. Don’t wear bifocals with the headset. To swap the lenses, use the insert-turn and lock mechanism. Also, keep the lenses clean. Avoid scratching the Oculus Rift CV1 lenses and keep them free of dirt and smudges.
Before you dive into VR, take a moment to clear your play area. Remove any obstacles that could cause you to trip or bump into things. It’s also a good idea to let people around you know that you’ll be immersed in a virtual world, so they don’t accidentally walk into your space. Safety first!
Understanding Virtual Reality Basics
Immersive Visual Experience
Okay, so what’s the big deal with VR? It’s all about tricking your brain into thinking you’re somewhere else. The goal is total immersion, where the digital world feels as real as the one around you. This is achieved through stereoscopic 3D visuals, head tracking, and a wide field of view. It’s more than just watching a movie; it’s like stepping inside one.
Object Manipulation in VR
Being able to see a virtual world is cool, but it gets way better when you can interact with it. Think about reaching out and grabbing a virtual object, throwing a ball, or even just pushing buttons on a control panel. This is where things like hand tracking and controllers come in. The more natural the interaction, the more believable the experience. Here are some common ways to interact:
- Controllers: Standard input devices for basic interactions.
- Hand Tracking: Using cameras to track your hand movements directly.
- Haptic Feedback: Devices that simulate touch and resistance.
Navigation Within Virtual Environments
So, you can see and touch stuff, but how do you move around? This is where navigation comes in. It’s not as simple as walking around your room because you’ll quickly run into a wall. There are a few common solutions:
- Teleportation: Point and click to instantly move to a new location.
- Artificial Locomotion: Using a joystick or touchpad to simulate walking or running.
- Room-Scale VR: Defining a physical space that corresponds to the virtual environment.
The key to good VR navigation is minimizing motion sickness. This means matching your visual movement with your physical sensations as closely as possible. If there’s a disconnect, your brain gets confused, and that’s when the nausea kicks in. Experiment with different methods to find what works best for you. You can find more information about virtual reality online.
Optimizing Performance for Mac Users
Let’s be real, getting the Oculus Rift DK2 to run smoothly on a Mac can be a bit of a challenge. Macs weren’t exactly designed with VR gaming in mind, so you might need to tweak a few things to get the best experience. Don’t worry, it’s totally doable! This section will walk you through some key areas to focus on.
Graphics Card Considerations
Okay, this is the big one. Your Mac’s graphics card is probably the most important factor in VR performance. Older Macs, especially laptops, often have integrated graphics or older dedicated cards that just can’t handle the demands of VR. Check your Mac’s specs to see what graphics card you have. If it’s below the recommended specs for the Oculus Rift DK2, you might struggle to get a smooth frame rate. You might want to consider best 360 players to watch VR videos if your Mac can’t handle VR games.
Managing External Monitors
Having multiple monitors connected to your Mac can sometimes impact VR performance. The system has to render images for all those displays, which can take away resources from the VR headset. Try disconnecting any external monitors before launching your VR experience to see if it makes a difference. Some users have found that mirroring the display to the Oculus helps, but your mileage may vary. Switchresx app can also help disable the primary screen.
Achieving Optimal Frame Rates
Frame rate is king in VR. A low frame rate can lead to motion sickness and a generally unpleasant experience. Here are a few things you can try to boost your frame rate:
- Lower the resolution in the Oculus configuration utility. This will reduce the load on your graphics card.
- Close any unnecessary applications running in the background. The fewer programs competing for resources, the better.
- Adjust the graphics settings in your VR games and applications. Turn down details like shadows, textures, and anti-aliasing.
It’s worth noting that some older Mac models might simply not be powerful enough to run certain VR experiences smoothly, regardless of what tweaks you make. Be prepared to adjust your expectations and focus on less demanding VR content.
Here’s a table showing the impact of different settings on frame rates (example):
| Setting | Impact on Frame Rate | Notes |
|---|---|---|
| Resolution | High | Lowering resolution can significantly improve frame rate. |
| Texture Quality | Medium | Reducing texture quality can provide a noticeable boost. |
| Shadow Quality | High | Shadows are resource-intensive; turning them off helps a lot. |
| Anti-Aliasing | Medium | Can smooth edges but also impact performance; try turning it down. |
Launching Your First VR Experience
Starting Demos and Applications
Alright, you’ve made it this far! Time to actually use your DK2. The first step is finding something to run. There are tons of free demos and applications out there, and many are specifically designed to show off what VR can do. Start with something simple and well-reviewed to avoid immediate frustration.
- Check the Oculus Share platform (if it’s still around) for community-created content.
- Explore SteamVR for compatible games and experiences.
- Look for demos specifically designed for the DK2; some newer VR content might not be fully compatible.
Configuring Game Settings
Once you’ve picked a demo, you’ll probably need to tweak some settings. VR can be demanding on your system, so don’t be afraid to dial things down. Here’s what to look for:
- Resolution: Start at 1080p and adjust upwards if your system can handle it. Remember, each eye needs its own image, so it’s more taxing than regular gaming.
- Refresh Rate: Try to match the refresh rate of your DK2 (60Hz or 75Hz). Some older games might only support 60Hz.
- Graphics Settings: Reduce shadows, anti-aliasing, and other intensive effects if you’re experiencing lag. Report problem if an app isn’t launching correctly.
It’s a good idea to experiment with different settings to find the sweet spot between visual quality and performance. Don’t be afraid to restart the game multiple times to test different configurations.
Troubleshooting Common Issues
VR can be finicky, so expect to run into some problems. Here are a few common ones and how to fix them:
- Image is distorted or blurry: Adjust the lens separation using the slider on the bottom of the DK2. Make sure the headset is positioned correctly on your head.
- Tracking is lost: Ensure your camera is properly positioned and that there are no obstructions in its field of view. Good lighting is also important.
- Game isn’t displaying in the headset: Make sure the DK2 is set as your primary display. In SteamVR, double-check that the game is set to launch in VR mode. Some games may require you to choose “Play with Oculus Rift”.
And if all else fails, Google is your friend! There’s a huge community of VR enthusiasts out there who have probably encountered the same problems you’re facing. You can even try guided meditation to calm your nerves!
Wrapping Things Up
So, there you have it. Getting your Oculus Rift DK2 up and running might seem like a lot at first, but if you take it step by step, it’s totally doable. We covered everything from plugging in cables to getting the software just right. It’s pretty cool to see how far virtual reality has come, even with these early kits. Now that you’ve got your DK2 ready, you can start checking out all the demos and experiences out there. Have fun exploring those new worlds!
Frequently Asked Questions
What exactly is the Oculus Rift DK2?
The Oculus Rift DK2 is a special headset that lets you step into a computer-made world. It’s like putting on goggles that show you a 3D picture that moves as you move your head, making you feel like you’re really there.
Why is it called a ‘Development Kit’?
The DK2 is a ‘Development Kit.’ This means it was made for people who wanted to create games and apps for virtual reality. It helped them test their ideas before the final version of the Oculus Rift came out.
Is it hard to set up the DK2?
Setting up the DK2 can be a bit tricky because it was an early version. You need to install special programs, plug in several cables, and adjust settings on your computer to make sure everything works together smoothly.
Do I need special software to make it work?
Yes, you need to download the Oculus Runtime and, if you plan to build things, the Software Development Kit (SDK). These are like the basic tools that make the headset understand what your computer is telling it.
What kind of computer do I need for the DK2?
The DK2 needs a strong computer, especially one with a good graphics card, to show you smooth virtual worlds. If your computer isn’t powerful enough, the experience might be choppy or blurry.
What does ‘virtual reality’ mean when I’m using the DK2?
Virtual reality lets you look around a digital space just by turning your head. You can also interact with things in that space, like picking up objects or moving through different areas, making it feel very real.
Where to Buy a Samsung Galaxy Phone and Gear VR Headset

So, you’re on the hunt for a Samsung Galaxy phone and a Gear VR headset? That’s a cool combo! Finding these items can be a bit tricky, especially the Gear VR, since things change fast in the tech world. But don’t worry, I’m here to help you figure out the best places to look, whether you want something brand new or are okay with a used one. We’ll also talk about what models to keep an eye out for and how to get a good deal. Let’s get started!
Key Takeaways
- New Gear VR headsets are getting harder to find, so check official Samsung spots, big electronics stores, and online sellers.
- Used Gear VRs are common on sites like eBay, but always check the item’s condition and what other buyers say about the seller.
- Different Gear VR models exist, like the SM-R323 or SM-R324, and some even come with their own controller.
- Older Gear VR models, like the one for the Galaxy S7, might be discontinued, but they can still work with some newer phones.
- Prices for Gear VRs can change a lot depending on if they’re new or used, and where you buy them from. Look for free shipping or ‘best offer’ chances to save some cash.
Finding New Samsung Gear VR Headsets
So, you’re on the hunt for a brand new Samsung Gear VR headset? Awesome! While they aren’t exactly flying off the shelves these days, there are still a few places you can check to snag one. Let’s break down the best spots to look.
Official Samsung Retailers
First stop: Samsung itself. Checking Samsung’s official website or physical stores is always a good starting point. They might still have some stock of the newer Gear VR models, or even some refurbished options that come with a warranty. Keep an eye out for deals, especially around holidays. Sometimes they bundle the Gear VR with phone purchases, which could save you some cash.
Authorized Electronics Stores
Next up, hit those big electronics retailers. Places like Best Buy or even smaller, local electronics shops could have some new Gear VR headsets lingering on their shelves. It’s worth a quick search on their websites or a call to the store to see what they’ve got. Don’t be afraid to ask if they have any clearance sales or open-box items available, too. You might get lucky!
Online Marketplaces for New Devices
Finally, there’s the online marketplace route. Amazon and other similar sites can be a mixed bag, but you can often find new Gear VR headsets from third-party sellers. Just be extra careful to check the seller’s ratings and read the product descriptions thoroughly. Make sure it clearly states that the item is new and comes in its original packaging. If the price seems too good to be true, it probably is.
Remember to compare prices across different retailers before making a purchase. Sometimes, you can find significant discounts just by doing a little bit of research. Also, factor in shipping costs and return policies to make sure you’re getting the best deal possible.
Purchasing Pre-Owned Gear VR Headsets
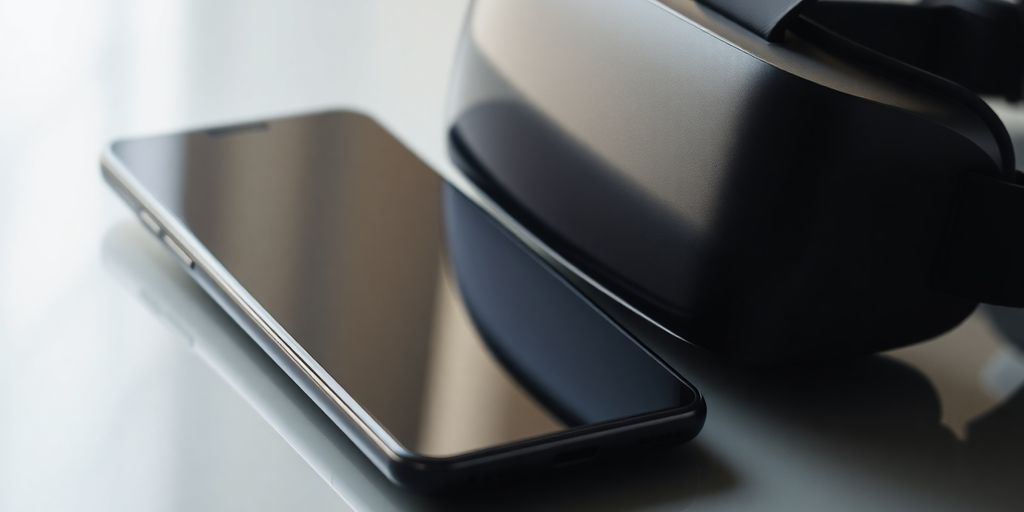
Sometimes, buying used is the way to go, especially if you’re trying to save some money or find a model that’s no longer in production. Here’s what to keep in mind when looking at pre-owned Gear VR headsets.
eBay Listings for Used Models
eBay can be a treasure trove for finding used Gear VR headsets. You’ll see a wide range of models and prices, but it’s important to be a smart shopper. Always check the seller’s feedback rating and read the full description carefully.
Checking Condition and Reviews
Before you hit that “Buy It Now” button, take a close look at the condition of the headset. Here’s a quick checklist:
- Cosmetic Condition: Scratches, dents, or other damage.
- Functionality: Make sure all buttons and features work.
- Lens Quality: Check for scratches or fogging on the lenses.
- Controller Condition (if included): Test all buttons and the touchpad.
Also, if the listing has reviews, read them! They can give you a heads-up about any potential issues.
Understanding Shipping and Offers
Shipping costs can add up, so pay attention to those. Some sellers offer free shipping, which is always a plus. Also, many listings have a “Best Offer” option. Don’t be afraid to make a reasonable offer – you might be surprised at what the seller accepts.
Buying used can be a bit of a gamble, but if you do your homework, you can score a great deal on a Gear VR headset. Just be patient, be thorough, and don’t be afraid to ask questions.
Identifying Specific Gear VR Models
It’s easy to get confused because there are a few different Gear VR models out there. Knowing exactly which one you’re looking at is important, especially when considering compatibility or trying to find replacement parts. Each model has its own specific features and design nuances. Let’s break down some of the common ones you might encounter.
Samsung Gear VR Oculus SM-R323 Black
This is one of the earlier models, and it’s pretty recognizable by its all-black design. It was made to work with phones like the Galaxy S6 and S7. If you’re thinking about getting one, keep in mind that it won’t work with newer phones. It’s a solid headset, but its compatibility is limited. You might find this one at a lower price, but make sure it fits your phone before you buy. If you are having compatibility issues, make sure to check the software version.
Samsung Gear VR with Controller SM-R324NZAAXAR
This model is a step up from the previous one, and the big difference is that it comes with a controller. The controller makes navigating the VR world much easier and more intuitive. It’s usually a light gray color, and it works with a wider range of phones, including the Galaxy S8 and Note 8. This is a good option if you want a more modern VR experience. The addition of the controller really does make a difference. This Samsung Gear VR is a great option for those looking for a more immersive experience.
Samsung Gear VR Powered By Oculus Headset Boxed With Controller
This one is a bit more of a complete package. It’s not just the headset and controller; it often comes with the original box and accessories. If you’re a collector or just want something that feels like new, this is a good choice. The fact that it’s “Powered by Oculus” means it uses the Oculus platform for its VR content, which has a lot of games and apps available. It’s a solid choice if you want a complete and ready-to-go VR experience.
It’s worth noting that while these headsets are cool, they are older technology. Newer VR headsets offer better resolution, tracking, and overall performance. However, if you’re on a budget or just curious about VR, these Gear VR models can be a good starting point.
Considering Discontinued Gear VR Models
It’s worth remembering that some Gear VR models are no longer in production. This doesn’t automatically make them bad choices, but it does mean you need to be a bit more careful when buying. Finding one might take a little more digging, and compatibility can be a concern. Let’s explore some of these older models.
Samsung Galaxy S7 / S7 Edge Gear VR Headset
This headset was specifically designed for the Galaxy S7 and S7 Edge. While it might work with other phones, the fit and performance aren’t guaranteed. Finding a new one of these is pretty unlikely, so you’ll almost certainly be looking at a used model. Keep an eye out for wear and tear, especially on the connector.
Availability of Older Versions
Finding older Gear VR versions can be a mixed bag. Some might be readily available on resale sites, while others are much harder to come by. Here’s a general idea of availability:
- Common: Original Gear VR (Innovator Edition)
- Less Common: Gear VR for Galaxy S6
- Rare: Gear VR for Note 4
Remember to check multiple sources and compare prices before committing to a purchase. You might even stumble upon a VR headset that offers similar features.
Compatibility with Newer Galaxy Phones
One of the biggest issues with older Gear VR models is compatibility. Newer Galaxy phones might not physically fit or might not be supported by the older software. Before buying, double-check that the headset is compatible with your specific phone model. Samsung’s website or online forums can be helpful resources for this. Also, consider that software updates for older headsets are unlikely, which could limit functionality over time.
It’s important to remember that discontinued models might not receive software updates. This could lead to compatibility issues with newer apps or even security vulnerabilities. Always weigh the pros and cons before buying an older device.
Understanding Gear VR Pricing
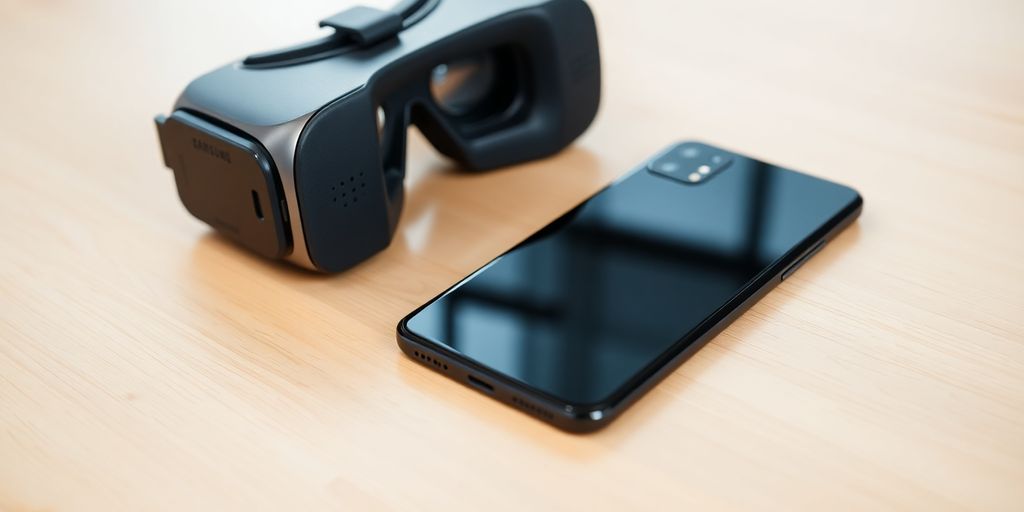
Let’s talk money. How much are you actually going to spend to get your hands on a Gear VR? It’s not always straightforward, and prices can vary quite a bit depending on where you’re looking and what condition you’re willing to accept.
Price Ranges for New Headsets
Finding a brand new Gear VR SM-R322 Oculus these days can be tricky since they aren’t actively manufactured. If you do find one still sealed in the box, expect to pay a premium. Prices can range anywhere from $80 to $200, maybe even more depending on the model and where you’re buying it from. Keep an eye out for retailers that might still have old stock, but be prepared for a higher price tag.
Cost of Pre-Owned Units
This is where things get interesting. The pre-owned market is your friend if you’re on a budget. You can often snag a used Gear VR for a fraction of the price of a new one. I’ve seen them go for as little as $20, but the average is probably closer to $30-$75. Of course, condition matters, so a pristine unit with all the original packaging will cost more than one that’s been heavily used and is missing accessories.
Factors Influencing Price
Several things can affect the price of a Gear VR, both new and used:
- Model: Newer models with controllers generally command higher prices.
- Condition: A like-new unit will always be more expensive.
- Completeness: Does it come with the original box, controller, and accessories?
- Seller: Prices can vary between retailers, online marketplaces, and individual sellers.
- Demand: If a particular model is rare or highly sought after, the price will likely be higher.
It’s worth doing some research and comparing prices from different sources before making a purchase. Don’t be afraid to haggle, especially when buying from individual sellers on online marketplaces. You might be surprised at how much you can save by being a savvy shopper.
Shipping and Purchase Options
Free Shipping Availability
Okay, so you’ve found the perfect Gear VR headset. Now, how do you get it home? A big factor for many is whether or not free shipping is available. Lots of retailers, especially online, will dangle the carrot of free shipping if you spend a certain amount. Keep an eye out for those deals. Sometimes, it’s worth adding a small, inexpensive item to your cart just to cross that threshold and save on shipping costs. Also, some marketplaces offer free shipping as part of a promotion or if you’re a member of their subscription service. Don’t forget to check the fine print, though! Free shipping might mean a longer delivery time, so weigh your options.
Best Offer Opportunities
Don’t be shy about trying to snag a better deal! On platforms like eBay, the “Best Offer” option can be your best friend. It’s a chance to haggle a bit and potentially get the Gear VR for a price that fits your budget. Do some research beforehand to see what similar headsets have sold for recently. This gives you a good idea of what’s a reasonable offer. Be polite and realistic with your offers, and you might be surprised at how often sellers are willing to negotiate. Remember, it never hurts to ask! Some retailers also have open box items or refurbished options that can be a great way to save money, and sometimes they’re open to negotiation as well.
Local Pickup Options
If you’re lucky enough to find a seller nearby, local pickup can be a fantastic option. It saves you on shipping costs, and you get the added bonus of inspecting the Gear VR in person before handing over your cash. Plus, it’s usually faster than waiting for delivery. When arranging a local pickup, always meet in a safe, public place. Bring a friend along if possible, and make sure you have a way to test the headset to ensure it’s working properly. It’s a win-win: you save money, get the item quickly, and avoid any potential shipping hassles. Consider using Samsung’s Trade-In Program if you have an old device to further reduce the cost.
Shipping costs can really add up, so it’s worth taking the time to explore all your options. Look for free shipping deals, try your luck with “Best Offer,” and consider local pickup if it’s available. A little bit of effort can save you a significant amount of money in the long run.
Verifying Product Authenticity
It’s super important to make sure you’re getting the real deal when buying a Gear VR, especially if you’re going for a used one. There are a few things you can do to avoid getting stuck with a fake. Counterfeit electronics are a real problem, and nobody wants to waste money on something that isn’t what it claims to be.
Checking for Samsung Branding
First off, take a close look at the branding. Genuine Samsung products will have clear, consistent, and high-quality logos and markings. Check for misspellings or blurry images, which are often red flags. Compare the logo on the headset and the box with official Samsung images online. Also, look for the model number; you can usually find this printed somewhere on the device itself or on a sticker. Cross-reference that model number with Samsung’s official website to confirm it matches the product description. If something seems off, it probably is.
Reviewing Seller Ratings
If you’re buying online, always check the seller’s rating and reviews. A seller with a long history of positive feedback is generally more trustworthy than someone new with little to no reviews. Look for comments that specifically mention the authenticity of the products they sell. Be wary of sellers with a lot of negative feedback or complaints about counterfeit items. It’s also a good idea to see if the seller responds to reviews, especially negative ones. A responsive seller is often more willing to resolve issues if something goes wrong. Also, check the Android version of the device you are using.
Authenticating Product Descriptions
Read the product description carefully. Does it sound professional and detailed, or is it full of errors and vague language? A legitimate seller will usually provide accurate and complete information about the product, including its condition, features, and any included accessories. Be suspicious of descriptions that are too good to be true or that contain generic phrases copied from other listings. Also, pay attention to the images. Do they look like stock photos, or are they actual pictures of the item being sold? If possible, ask the seller for additional photos or information before making a purchase. Here’s a quick checklist:
- Check for detailed specs.
- Verify the included accessories.
- Look for clear, high-quality images.
It’s always better to be safe than sorry. If you have any doubts about the authenticity of a Gear VR headset, it’s best to walk away and find a more reputable seller. Spending a little extra time and effort to verify the product can save you a lot of headaches in the long run.
Wrapping It Up
So, there you have it. Finding a Samsung Galaxy phone and a Gear VR headset isn’t too hard these days. You’ve got a bunch of choices, whether you like shopping online or hitting up a store. Just remember to check out different places to get the best deal. Happy shopping, and enjoy your new tech!
Frequently Asked Questions
Where can I buy a new Samsung Gear VR headset?
You can find brand new Samsung Gear VR headsets at official Samsung stores, big electronics shops, and online places like Amazon or Best Buy. These are good spots to make sure you’re getting a real, new product.
Is it possible to buy a used Gear VR headset?
Yes, you can often find used Gear VR headsets on websites like eBay. When buying used, always check the seller’s reviews and look closely at the pictures to see the item’s condition. Make sure you understand their shipping rules too.
What are some of the different Gear VR models I might see?
Some common models include the Samsung Gear VR Oculus SM-R323 Black, the Samsung Gear VR with Controller SM-R324NZAAXAR, and the Samsung Gear VR Powered By Oculus Headset Boxed With Controller. Each model might have slightly different features or come with different accessories.
Are older Gear VR models still available, and do they work with new phones?
Some Gear VR models, like the one for the Samsung Galaxy S7/S7 Edge, are no longer made. You might still find these older versions for sale, but remember that they might not work with the newest Galaxy phones.
How much do Gear VR headsets usually cost?
The price of a Gear VR headset can change a lot. New ones will cost more than used ones. Things like the model, its condition, and if it comes with a controller or other extras can also make the price go up or down.
How can I tell if a Gear VR headset is real and not fake?
To make sure a Gear VR headset is real, look for the Samsung logo and other brand marks. Also, check what other buyers say about the seller and read the product description carefully. If something seems too good to be true, it probably is.
Essential Accessories for Easier Gaming with Your Oculus Rift DK2

So, you’ve got yourself an Oculus Rift DK2. That’s pretty cool! But let’s be real, to really get the most out of it, you might need a few extra bits and pieces. It’s kind of like buying a new car and then realizing you still need gas, insurance, and maybe some cool fuzzy dice. This guide is all about what accessories can make your VR gaming experience way smoother and more fun. We’ll look at everything from how you control things to keeping comfy, and even some wilder stuff. Because who doesn’t want to make their virtual world as good as it can be?
Key Takeaways
- Good control systems, like gamepads or special flight sticks, make a big difference in how real VR feels.
- Sound is super important for VR; investing in good headphones or headsets can really pull you into the game.
- Software tools can help you play regular games in VR, which is a neat trick while we wait for more dedicated VR titles.
- Comfort accessories, like replacement face pads, are a must for longer play sessions and keeping things clean.
- Upgrading your PC’s graphics card is probably the best thing you can do to make your VR look and run better.
Optimizing Your Control Systems
Okay, so you’ve got your Oculus Rift DK2. Now what? The mouse and keyboard are fine for some things, but let’s be real, they aren’t going to cut it for true immersion. Let’s talk about getting some proper controls in place.
Standard Console Controllers
For a lot of people, the first step is a standard console controller. The Xbox 360 controller is a solid choice, especially since it’s often pretty cheap and easy to find. It’s plug-and-play for many games, and you might even have one lying around already. It’s a good starting point for getting used to VR controls without breaking the bank. Plus, the Oculus controllers are designed to work in a similar way, so it’s a good transition.
Specialized Flight and Racing Peripherals
If you’re into flight sims or racing games, you need to invest in some specialized peripherals. We’re talking steering wheels with force feedback, pedals, and HOTAS (Hands On Throttle-And-Stick) setups. These can seriously up your immersion. Sure, they can be pricey, but the experience is worth it if you’re serious about those genres. Think about it: feeling the resistance of the wheel as you drift around a corner, or the rumble of the engines through your flight stick. It’s a game changer.
Advanced Motion Controllers
Beyond the basics, there are advanced motion controllers. These are things like the Razer Hydra (though it’s older now) or even full-body tracking systems. They let you use your hands and body to interact with the virtual world. It’s still a developing area, but the potential is huge. Imagine reaching out and grabbing objects in VR, or using your actual body movements to control your character. It’s the next level of immersion, even if it requires a bit more setup and tweaking.
Getting the right control setup is key to enjoying your VR experience. It’s not just about having the latest and greatest gear, but about finding what works best for you and the types of games you play. Experiment, try different things, and don’t be afraid to invest in quality peripherals if you’re serious about VR.
Enhancing Audio Immersion
Audio is super important for making VR feel real. It’s not just about hearing sounds; it’s about hearing them correctly in relation to what you’re seeing. If a car whizzes by on your left in the game, you need to hear it primarily in your left ear. This is what makes the experience immersive. Let’s look at some ways to make the audio better.
High-Fidelity Headphones
Good headphones are a must. The built-in audio on the DK2 isn’t going to cut it. You want something that can deliver clear, accurate sound across a wide range of frequencies. Think about what kind of games you play. If you’re into shooters, you’ll want headphones that excel at reproducing directional audio so you can pinpoint enemy locations. For more cinematic experiences, look for headphones with a wider soundstage to make the environment feel bigger and more expansive. Don’t forget to check out Oculus Rift CV1 accessories for compatible options.
Surround Sound Headsets
Surround sound headsets take immersion to the next level. These headsets use multiple drivers in each ear cup to simulate a 3D soundscape. This can make a huge difference in games where spatial awareness is key. You’ll be able to hear sounds coming from all around you, which can give you a competitive edge. Some things to consider:
- True Surround Sound vs. Virtual Surround Sound: True surround sound headsets have multiple physical drivers in each ear cup. Virtual surround sound headsets use software to simulate the effect. True surround sound is generally better, but it’s also more expensive.
- Comfort: Make sure the headset is comfortable to wear for extended periods. VR sessions can last for hours, so you don’t want a headset that’s going to pinch or cause discomfort.
- Compatibility: Check to make sure the headset is compatible with your PC and the Oculus Rift DK2.
Noise-Cancelling Aviation Headsets
Okay, this might seem like an odd choice, but hear me out. Aviation headsets are designed to block out a lot of noise. This can be incredibly useful for VR, especially if you have a noisy environment. Imagine trying to play a horror game with the sound of traffic blaring in the background. Not exactly immersive, right? Aviation headsets can eliminate those distractions and let you focus on the game. Plus, they’re often built to be super comfortable, which is a bonus. Just be aware that they can be pricey, and they might not have the same frequency response as gaming headsets. Consider these points:
- Passive vs. Active Noise Cancellation: Passive noise cancellation uses physical barriers to block out sound. Active noise cancellation uses microphones and speakers to cancel out sound waves. Active noise cancellation is more effective, but it requires power.
- Microphone Quality: If you plan on using the headset for multiplayer games, make sure the microphone quality is good.
- Price: Aviation headsets can be expensive, so be prepared to spend some money.
A good audio setup can make or break your VR experience. Don’t skimp on the audio! It’s just as important as the visuals. Experiment with different headphones and headsets to find what works best for you and your games. You might be surprised at how much of a difference it makes.
Leveraging Software Injectors
One of the coolest things about getting into VR early is figuring out how to make existing stuff work with it. While dedicated VR games are becoming more common, there’s a whole world of traditional games that can be experienced in VR using software injectors. It’s not always perfect, but it opens up a lot of possibilities.
VR Injector Applications
VR injector applications are programs that let you play non-VR games in a stereoscopic 3D view on your Oculus Rift DK2. The main goal is to translate the game’s visuals into a format that works with the headset’s display. This involves rendering the game twice, once for each eye, to create the illusion of depth. It’s not always a smooth process, and results can vary wildly depending on the game and the injector used. Some popular options include VorpX and TriDef 3D. These programs often have customizable profiles for different games, allowing you to tweak settings for the best possible experience. It’s worth noting that performance can be a challenge, as rendering a game in stereoscopic 3D puts a significant strain on your PC’s hardware. You might need to lower graphics settings to maintain a playable framerate. Also, be prepared for some trial and error, as not every game will work perfectly, and you might encounter graphical glitches or other issues. For example, using VorpX settings can help improve the experience.
Virtual Cinema Experiences
Beyond gaming, software injectors can also create virtual cinema experiences. These applications simulate a movie theater environment within VR, allowing you to watch movies and videos on a giant virtual screen. It’s a pretty cool way to watch films, especially if you don’t have a large TV or home theater setup. Some apps, like VR Cinema, even let you customize the virtual environment, changing the size and shape of the screen, adjusting the lighting, and even adding virtual audience members. It’s a more immersive way to watch movies than just sitting in front of a regular screen. The downside is that the resolution of the DK2 might not be high enough for a truly crisp and clear image, especially on a large virtual screen. However, it’s still a fun and unique way to enjoy your favorite films. Plus, it can be a great way to escape into another world and forget about your surroundings. I find that using CINEVEO app is a great way to watch movies.
Compatibility with Traditional Games
One of the biggest challenges with VR injectors is compatibility. Games not designed for VR can have issues with things like head tracking, field of view, and motion sickness. Some games work surprisingly well, while others are completely unplayable. It really depends on the game’s engine and how it handles camera movement. Games with a fixed camera or slow, deliberate movement tend to work better than fast-paced action games. It’s also important to consider the game’s user interface. Menus and HUD elements designed for a flat screen can be difficult to read or interact with in VR. Some injectors offer tools to adjust the UI, but it’s not always a perfect solution. Despite these challenges, many gamers have found success using injectors to play their favorite games in VR. It’s a matter of experimenting and finding the right settings for each game. Here are some things to keep in mind:
- Check online forums and communities for compatibility lists and recommended settings.
- Start with games that are known to work well with injectors.
- Be prepared to tweak settings and experiment to find what works best for you.
Software injectors are a great way to expand your VR experience beyond dedicated VR games. While they’re not always perfect, they offer a unique and immersive way to play traditional games and watch movies. Just be prepared for some trial and error, and don’t expect every game to work flawlessly.
Essential Comfort and Hygiene Accessories
Let’s be real, strapping a screen to your face can get a little gross. Especially during intense gaming sessions where you’re dodging virtual bullets or racing at breakneck speeds. Sweat happens, and that foam padding on your Oculus Rift DK2? It’s a sponge. Luckily, there are some simple solutions to keep things clean and comfortable.
Replacement Facial Interfaces
The stock facial interface on the DK2 is okay, but it’s not exactly designed for heavy use or sharing. Upgrading to a replacement interface, especially one made of a non-absorbent material like PU leather, can make a world of difference. These interfaces are easy to wipe down between uses, preventing the buildup of sweat and bacteria. Plus, some replacement interfaces are designed to improve airflow, reducing fogging and keeping you cooler during long sessions.
VR Cover Solutions
Disposable VR headset covers are a game-changer, especially if you’re sharing your DK2 with friends or family. Think of them as little sweatbands for your VR headset. They slip over the existing facial interface and absorb moisture, keeping the foam clean and dry. You can also find washable fabric covers, but disposable ones are super convenient for quick cleanups. VR Cover offers a range of products, including Oculus Rift facial interface replacements, to keep your headset fresh.
Thinner Cushions for Increased FOV
While comfort is key, some users find that the stock facial interface sits too far from their eyes, reducing the field of view (FOV). Thinner cushions can help bring your eyes closer to the lenses, increasing your FOV and making the experience more immersive. Just be aware that thinner cushions might not be as comfortable as the stock ones, so it’s a trade-off. You can find premium kits that include both thinner cushions and comfortable velour options.
Keeping your VR headset clean isn’t just about hygiene; it’s about preserving the longevity of your equipment. Sweat and oils can degrade the foam and other materials over time, so taking a few simple steps to protect your headset can save you money in the long run.
Here’s a quick comparison of different facial interface options:
| Material | Pros | Cons |
|---|---|---|
| Stock Foam | Comfortable, comes with the headset | Absorbs sweat, difficult to clean |
| PU Leather | Easy to clean, water-resistant | Can feel less breathable than foam |
| Disposable Covers | Hygienic, convenient for sharing | Can be wasteful, may not be as comfortable as dedicated cushions |
| Thinner Cushions | Increases FOV | May be less comfortable than stock cushions |
Exploring Unique VR Peripherals

Beyond the standard controllers and headsets, the world of VR offers some truly unique peripherals that can significantly enhance immersion. These gadgets might seem a bit out there, but they can add a whole new dimension to your virtual experiences. Let’s take a look at some of the more interesting options.
Immersive Fan Systems
Imagine feeling the wind in your hair as you soar through the skies in a flight simulator, or the rush of air as you speed down a virtual racetrack. That’s the promise of immersive fan systems. These systems synchronize with the in-game environment to simulate wind effects, adding a tactile element to your VR experience. The sensation of wind can really trick your brain into feeling more present in the virtual world.
- Adds a layer of realism to flying and racing games.
- Can be adjusted to match the intensity of the in-game wind.
- Relatively easy to set up and integrate with existing VR setups.
It’s amazing how much a simple breeze can impact your sense of presence. These fan systems aren’t just about novelty; they genuinely make VR feel more real.
Specialized Gun Controllers
For first-person shooter fans, specialized gun controllers can provide a much more realistic and engaging experience than using a standard gamepad. These controllers often mimic the weight and feel of real firearms, and some even incorporate haptic feedback to simulate recoil. Holding a realistic-feeling weapon in your hands can make all the difference in a tense firefight.
- Enhances immersion in shooting games.
- Provides a more natural aiming experience.
- Some models include haptic feedback for added realism.
Full-Body Tracking Solutions
While head and hand tracking are now commonplace in VR, full-body tracking takes things to the next level. These systems use a combination of sensors and trackers to capture your entire body’s movement, allowing you to see your virtual avatar move in perfect sync with your real-world actions. Imagine dancing in a virtual club, practicing martial arts, or simply interacting with objects using your whole body. The possibilities are endless.
- Enables full-body interaction in VR.
- Creates a more realistic and immersive avatar experience.
- Opens up new possibilities for social VR and gaming.
Here’s a quick comparison of some full-body tracking solutions:
| System | Tracking Method | Price | Pros | Cons |
|---|---|---|---|---|
| Vive Trackers | External Base Stations | Expensive | Accurate, reliable | Requires base stations, limited tracking area |
| Kinect | Camera-Based | Affordable | Easy setup, no additional hardware needed | Less accurate, prone to occlusion |
| Custom IMU | Inertial Measurement Units | Varies | Wireless, portable | Requires calibration, drift can be an issue |
Curating Your VR Software Library
VR hardware is cool and all, but without great software, it’s just an expensive paperweight. Finding the right VR experiences can be a bit of a treasure hunt, but it’s worth the effort. Let’s explore some ways to build up your VR software collection.
Official Oculus VR Share
Back in the day, Oculus VR Share was the place to find early VR content. It was like the Wild West of VR development, full of experimental projects and tech demos. While it might not be as central as it once was, it’s still worth checking out for unique and sometimes quirky experiences. You might find some hidden gems that show off the potential of virtual reality.
Community-Driven Software Lists
The VR community is awesome at curating lists of cool software. Sites like Reddit’s r/Oculus and other dedicated VR forums often have threads and wikis dedicated to compiling the best VR games, experiences, and tools. These lists are great because they’re based on real user feedback and often include lesser-known titles that you might not find otherwise. Plus, you can usually find helpful tips and tricks for getting the most out of each piece of software.
Dedicated VR Game Platforms
Of course, you can’t forget about the official VR game platforms like the Oculus Store and SteamVR. These platforms offer a wide selection of VR games and experiences, ranging from AAA titles to indie gems. They also provide a convenient way to purchase, download, and manage your VR software library. Keep an eye out for sales and bundles to snag some great deals on popular VR games.
Building a great VR software library takes time and effort, but it’s an investment that will pay off in the long run. Don’t be afraid to experiment with different types of experiences and explore the hidden corners of the VR world. You never know what amazing things you might discover.
Upgrading Your PC Hardware
VR on the Oculus Rift DK2 can be pretty demanding, so let’s talk about beefing up your PC. It’s not just about having a graphics card; it’s about having the right graphics card and enough power to push those pixels to both eyes, twice. And don’t forget the CPU and RAM – they play a big role too.
High-Performance Graphics Cards
The graphics card is arguably the most important component for a good VR experience. You’re aiming for smooth frame rates and high resolutions. Back when the DK2 was the hot thing, you needed a pretty powerful card to get decent performance. Now, even mid-range cards can handle it, but if you want to crank up the settings and get the best visuals, you’ll still want something beefy. Check out some PC components for the best performance.
Processor and RAM Considerations
It’s easy to focus on the graphics card, but your CPU and RAM are also important. The CPU handles all the game logic, physics, and other calculations, while RAM provides quick access to data. If your CPU is too slow, it can bottleneck your graphics card, and if you don’t have enough RAM, you’ll experience stuttering and slowdowns. Aim for at least 8GB of RAM, but 16GB is better, and a decent multi-core CPU.
Optimizing for Stereoscopic 3D
VR isn’t just about rendering a single image; it’s about rendering two images, one for each eye. This is called stereoscopic 3D, and it puts a lot of extra strain on your system. Here are a few things to keep in mind:
- Make sure your graphics drivers are up to date. Driver updates often include performance improvements for VR games.
- Adjust the graphics settings in your VR games. Lowering the resolution or turning off some of the more demanding effects can significantly improve performance.
- Close any unnecessary applications running in the background. These can steal resources from your VR games.
Upgrading your PC for VR can be expensive, but it’s worth it if you want to have a good experience. A powerful graphics card, a decent CPU, and enough RAM will make a big difference in the smoothness and visual quality of your VR games. Don’t skimp on these components if you want to get the most out of your Oculus Rift DK2.
Wrapping Things Up
So, there you have it. Getting your Oculus Rift DK2 set up for the best gaming experience means thinking about more than just the headset itself. From making sure you have the right controllers to maybe even grabbing some extra comfort stuff, these little additions can really change how you play. It’s all about making your virtual world feel as real as possible. And hey, with new things coming out all the time, keeping an eye on what’s next is always a good idea. Happy gaming!
Frequently Asked Questions
What exactly is an Oculus Rift DK2?
The Oculus Rift DK2 is a special version of the virtual reality headset made for people who develop games and apps. It’s not the final product for everyone to buy, so it might need a bit more effort to get everything set up and working just right. Think of it like a sneak peek for creators!
What kind of controllers should I get for my DK2?
You’ll definitely want a good controller! Many people start with an Xbox 360 controller because it’s easy to find and works well. For games like flight or racing, special joysticks or steering wheels make it feel much more real. And for the best experience, motion controllers that let you use your hands in the game are a must-have.
How can I make the sound better for my VR games?
To really feel like you’re inside the game, good sound is key. High-quality headphones or headsets that block out noise are great. Some even have surround sound, so you can hear where sounds are coming from all around you. This helps make the virtual world feel more real.
Can I play regular games on my DK2, or just VR games?
Since the DK2 is a development kit, many games are still being made. But there are tools called ‘software injectors’ that can help you play regular computer games in VR. Also, there are special apps that turn your VR headset into a virtual movie theater, which is pretty cool!
Are there accessories to make the headset more comfortable or clean?
Yes, comfort is important! You can get different face pads for your headset. Some are thinner, which can make the screen look bigger and more immersive. There are also special covers that help keep the headset clean, especially if you’re sharing it or playing active games.
What kind of computer do I need to use with my DK2?
To get the most out of your DK2, you’ll want a powerful computer. A strong graphics card is super important because VR needs a lot of processing power to create those detailed 3D worlds. Also, make sure your computer has enough memory (RAM) and a good processor to keep things running smoothly.
ASUS, Dell, and Alienware Unveil Oculus Rift-Ready PC Bundles

So, you’re thinking about getting into virtual reality, huh? Specifically, the Oculus Rift? Well, to really get the most out of it, you’re gonna need a pretty powerful computer. Good news, though! Oculus teamed up with some big names like ASUS, Dell, and Alienware to offer special PC bundles. These are designed to work perfectly with the Rift right out of the box. You can start pre-ordering these bundles pretty soon, on February 16th, if you’re ready to jump into VR.
Key Takeaways
- New PC bundles from ASUS, Alienware, and Dell are coming out, made just for the Oculus Rift.
- These computers are tested and approved by Oculus to make sure your VR experience is good.
- You can start pre-ordering these bundles on February 16th, and they’ll ship out in April.
- Bundles come with the Rift headset, a sensor, a remote, an Xbox One controller, and two games.
- If you already pre-ordered a Rift headset, you might get a special discount on these PCs.
Oculus Rift-Ready PC Bundles Unveiled
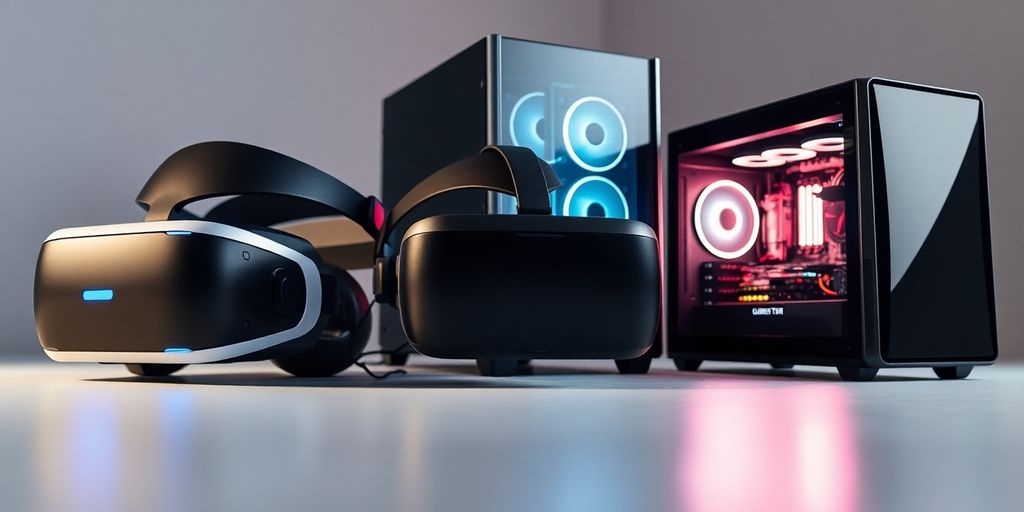
Initial Partnerships with ASUS, Alienware, and Dell
So, Oculus is trying to make getting into VR a bit easier. They’ve teamed up with ASUS, Alienware, and Dell to create PC bundles that are guaranteed to work with the Oculus Rift. This means you don’t have to worry about whether your current computer is powerful enough. It’s a pretty smart move, honestly. It takes a lot of the guesswork out of the equation for people who are new to VR and might not know what specs they need.
Certified for Optimal Rift Experience
Oculus is saying these PCs have been “battle-tested.” What does that even mean? Well, apparently, Oculus themselves have put these machines through the wringer to make sure they can handle the demands of VR. They want to make sure everyone has a good experience right out of the box. It’s all about making VR more accessible and less of a headache. Here’s what they are trying to do:
- Make sure the frame rates are smooth.
- Reduce motion sickness.
- Ensure compatibility with all Oculus Rift games and experiences.
Pre-Orders Begin February 16th
Mark your calendars! If you’re interested in grabbing one of these bundles, pre-orders start on February 16th. That’s the day you can actually put your money down and reserve your spot in line. I’m curious to see how quickly these things sell out. I have a feeling there will be a lot of people eager to jump into VR without the hassle of building their own PC.
It’s a big step for virtual reality. By partnering with established PC manufacturers, Oculus is hoping to bring VR to a wider audience. The pre-order date is a key moment, and it will be interesting to see how the market responds to these pre-built bundles.
Pricing and Availability Details
Bundles Starting at $1,499
Okay, so let’s talk money. The Oculus Rift-ready PC bundles start at $1,499. This gets you the whole shebang – the PC and the Rift. It’s a chunk of change, no doubt, but think of it as your ticket to another dimension.
Price Range from $949 to $2,594
If you’re looking at just the PCs, without the headset, the prices vary. You’re looking at a range from $949 all the way up to $2,594. The ASUS G11CD-WS is the most affordable Oculus-ready PC option. What you get for that price jump? Better graphics cards, faster processors, more RAM – the works. It really depends on how serious you are about your VR experience.
Pre-Orders Through Best Buy, Amazon, and Microsoft Store
Want to get your hands on one of these bundles? Pre-orders kick off February 16th. You can snag them through Best Buy, Amazon, and the Microsoft Store. So, you’ve got options. Just be ready to jump on it, because I have a feeling these things are going to sell fast.
It’s worth noting that some of these bundles have special pricing if you buy them with a Rift headset. If you already pre-ordered a Rift, you might be eligible for those discounted rates. Double check the details on the retailer’s website to make sure you’re getting the best deal.
Bundle Contents and Savings

Includes Rift Headset, Sensor, Remote, and Xbox One Controller
Okay, so what do you actually get in these bundles? Well, it’s more than just a PC. You’re looking at the Oculus Rift headset itself, of course, plus the sensor to track your movements. They also throw in the Oculus Remote, which is handy for some of the simpler VR experiences. And, to top it off, you get an Xbox One controller. It’s a pretty complete package to get you started.
Two Included Games: EVE: Valkyrie and Lucky’s Tale
To sweeten the deal, Oculus is including two games with these bundles: EVE: Valkyrie and Lucky’s Tale. EVE: Valkyrie is a space combat shooter that’s supposed to be pretty immersive in VR. Lucky’s Tale is a cute platformer that’s a bit more family-friendly. It’s a nice way to show off the range of experiences VR can offer.
Special Bundle Pricing for Cost Savings
The big selling point here is the cost savings. Buying all of this stuff separately would definitely set you back more. Oculus and its partners are trying to make VR more accessible by offering these bundles at a lower price than if you bought each component individually. It’s a way to jump into VR without completely emptying your wallet.
It’s worth noting that the actual amount you save can vary depending on the retailer and any ongoing promotions. So, it’s a good idea to shop around and compare prices before you commit to a bundle. Keep an eye out for deals, especially around holidays or special events. You might be able to snag an even better price.
Shipping and Delivery Information
Limited Quantities Available at Launch
Okay, so here’s the deal: if you’re thinking about grabbing one of these Oculus Rift-ready PC bundles, you should know that they aren’t making a ton of them right away. It sounds like the initial launch is going to have limited quantities. So, if you really want one, pre-ordering is probably the way to go. Don’t wait around thinking you’ll just stroll into a store in a few weeks and pick one up, because they might be gone.
Shipments Expected to Begin in April
Alright, so you’ve pre-ordered your shiny new VR-ready PC. Now comes the waiting game. The current word is that shipments are expected to kick off sometime in April. It’s not exactly next-day delivery, but hey, good things come to those who wait, right? Just try to contain your excitement until then. I know, easier said than done.
Early Access for Pre-Order Customers
Here’s a little perk for those of you who jumped on the pre-order bandwagon: it sounds like you might get early access. What exactly does that mean? Well, it’s not crystal clear, but it could mean your order ships out sooner than everyone else’s, or maybe you get some kind of exclusive content or discount. Either way, it pays to be an early adopter.
It’s important to keep an eye on the official Oculus website and the retailers’ pages (Best Buy, Amazon, Microsoft Store) for the most up-to-date information on shipping dates and any potential delays. Things can change, especially with new tech launches, so stay informed.
Here’s a quick rundown of what to expect:
- Pre-order: Secure your bundle ASAP.
- Patience: Shipments start in April.
- Perks: Early access might be included.
Oculus Certification Process
PCs Battle-Tested by Oculus
So, Oculus didn’t just pick these PCs at random. They put them through the wringer! These machines have been rigorously tested to make sure they can handle the demands of VR. It’s not just about having a powerful graphics card; it’s about the whole system working together smoothly. They want to make sure your VR experience isn’t ruined by a lagging or glitching PC.
Ensuring a Seamless VR Experience
The goal here is simple: a great VR experience, every time. No one wants to deal with stuttering graphics or dropped frames when they’re trying to explore a virtual world. Oculus wants to ensure youth apps run smoothly. By certifying these PCs, they’re trying to take the guesswork out of the equation. You can trust that if a PC has the Oculus stamp of approval, it’s ready to go.
Meeting Recommended Specifications
To get that certification, the PCs have to meet certain minimum requirements. It’s not just about having the latest and greatest hardware, but about having the right hardware. Here’s what they look for:
- A powerful CPU
- A high-end graphics card
- Enough RAM to handle VR applications
- The right ports for connecting the headset
It’s all about making sure the PC can keep up with the demands of virtual reality. If your PC doesn’t meet these specs, you might still be able to use the Rift, but you might not get the best possible experience. It’s like trying to run a marathon in flip-flops – technically possible, but not ideal. You can use a compatibility tool to check your PC.
Options for Existing Rift Owners
Discounted PC Rates for Pre-Ordered Headsets
So, you already jumped on the Oculus Rift pre-order bandwagon? Good news! Oculus isn’t forgetting about you. They’re offering discounted rates on those fancy, Oculus-endorsed PCs for people who pre-ordered the headset. To snag this deal, you’ll need to check your order status. Look for an option to opt into partner offers. If you do that, you should see some offer codes pop up on your order status page around February 16th. It’s like a little reward for being an early adopter.
Eligibility for Partner Offers
Not everyone will automatically get these partner offers. It depends on your region, for one thing. Make sure you check your order details carefully to see if you’re eligible. It’s worth a look, because these discounts could save you a good chunk of change if you’re planning to upgrade your PC anyway.
Verifying PC Compatibility with Oculus Tool
Even if you don’t want a new PC, you should still check if your current rig can handle the Rift. Oculus has a compatibility tool that you can download. It’ll automatically test your computer against the recommended system specs. It’s a simple way to avoid disappointment when your Rift finally arrives. No one wants to deal with laggy VR, trust me.
It’s a smart move to verify your PC’s compatibility. This way, you can make an informed decision about whether to upgrade or stick with what you have. Plus, knowing your PC meets the requirements will make the whole VR experience way more enjoyable.
Building Your Own VR-Ready PC
Alternative to Pre-Built Bundles
Not feeling the pre-built PC bundles? No problem! Building your own VR-ready PC is a totally viable option, and for some, it might even be the preferred route. It lets you pick and choose components, potentially saving some money or getting more power for your buck. Plus, there’s a certain satisfaction in knowing you built the machine yourself. It’s like saying, “Yeah, I can handle virtual reality, and I built the computer to prove it!”
Meeting Minimum Hardware Requirements
Okay, so you’re going the DIY route. Awesome! But before you start throwing parts into a cart, you need to know what the minimum hardware requirements are. These specs aren’t just suggestions; they’re what you need to have a decent VR experience. Trying to skimp on the minimum hardware will probably lead to a laggy, nauseating mess, and nobody wants that. Here’s a general idea of what you’ll need:
- CPU: Intel Core i5-4590 / AMD FX 8350 or better
- GPU: NVIDIA GeForce GTX 970 / AMD Radeon R9 290 or better
- RAM: 8GB+
- Video Output: HDMI 1.3
- USB Ports: 3x USB 3.0 ports plus 1x USB 2.0 port
- Operating System: Windows 7 SP1 64-bit or newer
Keep in mind that these are minimums. For a truly great experience, you’ll probably want to aim higher. Games are only getting more demanding, so future-proofing is a good idea.
Standalone Oculus Rift Purchase Option
If you’re building your own PC, you’ll need to buy the Oculus Rift separately. This is pretty straightforward; you just order it directly from Oculus or from a retailer that carries it. The price is around $599, but keep an eye out for deals. Once you have the headset, you’re all set to plug it into your custom-built VR machine and jump into virtual reality. Just make sure you’ve got all those USB and HDMI ports ready to go!
Building your own VR-ready PC can seem daunting, but it’s a rewarding experience. Take your time, do your research, and don’t be afraid to ask for help from online communities. There are tons of people who have been there and are happy to share their knowledge. Good luck, and happy building!
Conclusion
So, there you have it. These new PC bundles from ASUS, Dell, and Alienware are a pretty big deal for anyone wanting to jump into virtual reality with the Oculus Rift. It’s cool that they’re making it easier to get everything you need in one go, even if the price tag is a bit high for some. But hey, if you’re serious about VR, these ready-to-go setups could save you a lot of headaches trying to figure out if your current computer can handle it. It’s a step forward for VR, making it more accessible to folks who just want to plug in and play.
Frequently Asked Questions
Who makes these VR-ready computer bundles?
These special computer bundles are made by companies like ASUS, Alienware, and Dell. They’ve been checked by Oculus to make sure they work great with the Rift headset.
When and where can I buy these computer bundles?
You can start ordering these bundles on February 16th. They will be available at popular stores like Best Buy, Amazon, and the Microsoft Store.
How much do these computer bundles cost?
The bundles start at $1,499. The price can go up to $2,594, depending on how powerful the computer is. There are also some cheaper options that start at $949 if you buy them with the Rift headset.
What’s included in these computer bundles?
Each bundle comes with the Oculus Rift headset, a sensor, a remote control, and an Xbox One game controller. You also get two free games: EVE: Valkyrie and Lucky’s Tale.
Can I use my own computer with the Oculus Rift?
Oculus has a special tool you can download to check if your current computer is strong enough to run the Rift. This way, you can see if you need a new computer or not.
Are there any deals for people who already ordered an Oculus Rift headset?
If you already ordered an Oculus Rift headset, you might be able to get a special discount on these computers. Make sure to check your order details and sign up for partner offers.
Watch 3D Movies on Samsung Gear VR: Your Ultimate Guide

So, you’ve got a Samsung Gear VR and you’re ready to dive into some awesome 3D movies? That’s a great choice! Getting your own personal cinema set up is actually pretty simple. Whether you’re just starting out or looking to get the most from your headset, this guide will walk you through everything you need to know to watch your favorite films in a whole new way. Let’s get your virtual movie night going!
Key Takeaways
- Make sure your Samsung phone is compatible with the Gear VR before you start.
- The Oculus Video app is your main tool for watching movies on the Gear VR.
- Know the difference between Side-by-Side and Over/Under 3D video formats for best viewing.
- You can stream movies from your computer to your Gear VR for more options.
- Adjusting sound and managing battery life will make your movie sessions better.
Setting Up Your Gear VR
So, you’re ready to jump into the world of VR with your Samsung Gear VR? Awesome! Getting everything set up correctly is super important for a good experience. Let’s walk through it.
Compatible Samsung Galaxy Smartphones
First things first, you need to make sure you have a compatible phone. The Gear VR isn’t universal; it only works with certain Samsung Galaxy models. Using an incompatible phone can damage both the phone and the headset, so double-check! Here’s a quick list of phones that are generally compatible:
- Samsung Galaxy S6
- Samsung Galaxy S6 Edge
- Samsung Galaxy S6 Edge+
- Samsung Galaxy S7
- Samsung Galaxy S7 Edge
- Samsung Galaxy Note 5
- Samsung Galaxy S8
- Samsung Galaxy S8+
- Samsung Galaxy Note 8
- Samsung Galaxy S9
- Samsung Galaxy S9+
- Samsung Galaxy Note 9
- Samsung Galaxy S10 series (S10e, S10, S10+)
Keep in mind that this list might not be exhaustive, and compatibility can change with software updates. Always refer to the official Samsung Gear VR product FAQs for the most up-to-date information.
Initial Software Installation
Okay, phone compatibility confirmed? Great! Now, let’s get the software installed. The first time you plug your compatible phone into the Gear VR headset, the Oculus software should automatically start installing. If it doesn’t, make sure your phone is unlocked and that you’ve allowed the Gear VR service to access your phone. You’ll need a few things:
- Oculus Account: You’ll need to create an Oculus account (if you don’t already have one) and log in. This is how you’ll access the Oculus store and your VR content.
- Wi-Fi Connection: Make sure your phone is connected to a stable Wi-Fi network. The initial software download can be pretty big, and you don’t want to burn through all your mobile data.
- Patience: The installation process can take a little while, so just let it do its thing. Don’t interrupt it, or you might have to start over.
It’s a good idea to close all other apps running in the background on your phone before starting the installation. This frees up resources and can help the process go a bit faster. Also, make sure your phone is charged or plugged in, just in case.
Optimizing Image Quality
Alright, software’s installed, and you’re almost ready to go! But before you jump in, let’s talk about getting the best possible image quality. A blurry or uncomfortable image can really ruin the VR experience. Here are a few things to tweak:
- Focus Wheel: The Gear VR has a focus adjustment wheel on the top. Use this to fine-tune the image until it’s crystal clear for your eyes. Everyone’s vision is different, so take your time to get it just right.
- Headset Positioning: Even with the focus wheel adjusted, the position of the headset on your face can make a big difference. Try tilting the headset slightly forward or backward to find the sweet spot.
- Cleanliness: This might sound obvious, but make sure the lenses inside the Gear VR are clean! Dust, smudges, or fingerprints can seriously degrade the image quality. Use a microfiber cloth to gently wipe them clean.
Getting the image quality dialed in is worth the effort. A sharp, clear picture will make your VR experiences much more immersive and enjoyable. Now you’re ready to start watching downloaded videos!
Mastering Gear VR Controls
Okay, so you’ve got your Gear VR all set up. Now what? It’s time to learn how to actually use the thing. Don’t worry, it’s not rocket science, but there are a few things you should know to get the most out of your experience.
Understanding the Touchpad Controller
The touchpad is your main way of interacting with the VR world. Think of it as your mouse and keyboard all rolled into one. It’s located on the right side of the headset, and you use your finger to swipe and tap. A single tap is usually ‘select’ or ‘enter’, while swiping lets you scroll through menus or move around in some games. Some apps also use multi-finger gestures, but those are less common. It might feel a little awkward at first, but you’ll get the hang of it pretty quickly. I remember when I first got mine, I kept accidentally hitting the back button, but now it’s second nature.
Navigating Menus with Ease
Once you’re in the Oculus Home screen, you’ll see a bunch of different options. Looking around with your head moves the cursor, and you use the touchpad to select things. Most menus are pretty straightforward, but sometimes it can be tricky to find what you’re looking for. A good tip is to take your time and really look around. The menus are designed to be immersive, so sometimes the option you want is hidden in plain sight. Also, don’t be afraid to experiment! You can’t really break anything, so just try tapping on different things to see what they do.
Returning to the Main Menu
Getting back to the main menu is super important, especially when you’re switching between apps or movies. There’s a dedicated back button located right above the touchpad. Just give it a tap, and you’ll be whisked away to the Oculus Home. If you’re ever lost or confused, just remember: back button to the rescue! It’s like the panic button of the VR world. I’ve definitely used it a few times when I got stuck in some weird settings menu. It’s also worth noting that some apps have their own in-app menus, so you might need to exit those first before you can get back to the main Oculus menu. It’s a bit like having menus within menus, but once you understand the hierarchy, it becomes pretty easy to manage.
Mastering the Gear VR controls is key to enjoying your VR experience. Take some time to practice and get comfortable with the touchpad and button placements. Once you do, you’ll be navigating the virtual world like a pro in no time.
Watching Your Own Movies
So, you’ve got your Gear VR all set up and you’re ready to watch your own movies? Awesome! It’s actually pretty straightforward. Let’s get into how to do it.
Using the Oculus Video Application
The Oculus Video app is your go-to for watching your own stuff. It comes pre-installed, so you don’t have to worry about downloading anything extra. This app is designed to recognize and play your video files, whether they’re regular, 3D, or even 360° videos. Just make sure your videos are in a compatible format (MP4 is usually a safe bet). I’ve had some issues with older AVI files, so keep that in mind. To get started:
- Open the Oculus app on your phone.
- Put on your Gear VR.
- Navigate to the “Video” section using the touchpad.
Selecting Your Video Library
Once you’re in the Oculus Video app, you’ll see a few options, like streaming services and stuff. But what we want is your own video library. Look for something like “My Videos” or “Your Videos” – it might be at the bottom of the list. Tap on that, and it should bring up all the videos that are stored on your phone. If you don’t see your videos, double-check that they’re in the right folder. The Gear VR usually looks in the /Oculus/Movies/ folder. You might need to transfer the videos from your computer to that folder using a USB cable.
Choosing a Virtual Theater
Okay, this is where it gets kinda cool. The Oculus Video app lets you pick a virtual environment to watch your movie in. You can watch your movie in a home theater, on the moon, or even in a creepy void. It’s all about what kind of vibe you’re going for. Each theater has a different feel, and some even have different lighting. Experiment and see which one you like best! I personally like the home theater for most movies, but the void is fun for horror flicks. Once you’ve picked your theater, just select your movie and hit play. Enjoy the show!
Watching movies in VR is a really cool experience. It’s like having your own private cinema. The immersion is great, and it really helps you get lost in the movie. Just remember to take breaks every now and then, because staring at a screen that close can get tiring after a while.
Downloading 3D Movies for Gear VR
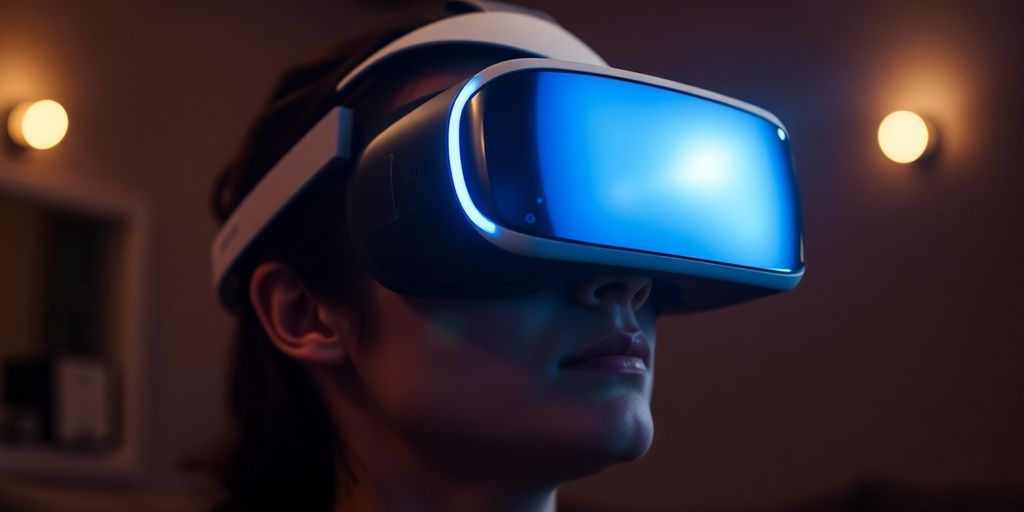
So, you’re ready to watch some awesome 3D movies on your Gear VR? Great! But first, you need to get those movies onto your phone in a format the Gear VR can understand. It’s not too hard, but there are a few things you should know.
Understanding 3D Video Formats
Okay, let’s talk about 3D video formats. The two main types you’ll encounter are Side-by-Side (SBS) and Over/Under (also called Top/Bottom). Basically, these formats cram two slightly different views of the same scene into one video file – one view for each eye, creating the 3D effect. It’s like those old View-Master toys, but digital!
- Side-by-Side (SBS): The left and right eye views are placed next to each other horizontally.
- Over/Under (Top/Bottom): The left and right eye views are stacked vertically.
- Full SBS: Maintains the full resolution for each eye.
- Half SBS: Halves the horizontal resolution for each eye to save space.
Side-by-Side Versus Over/Under
So, which format is better? Well, it depends. Side-by-Side is generally more common, but Over/Under can sometimes offer better image quality, especially if the original source is high-resolution. The Gear VR handles both, but you might need to tweak some settings, which we’ll get to in a sec. Think of it like choosing between different types of popcorn – both are good, but they have their own unique qualities. If you want to play 3D Blu-ray movies, you’ll need to convert them to one of these formats first.
Configuring Over/Under Movies
Here’s the thing: the Gear VR automatically assumes that all 3D movies in your “3D” folder are in SBS format. If you’ve got an Over/Under movie, you need to tell it! Otherwise, it’ll look all wonky and not-3D-ish at all. It’s like trying to wear your shoes on the wrong feet – uncomfortable and just plain wrong.
Here’s how to do it:
- Open Notepad (or any plain text editor).
- Copy and paste the following code:
{
"format": "3DTB"
}
- Save the file with the EXACT same name as your movie file, but with a
.txtextension. For example, if your movie is calledAwesome3DMovie.mp4, save the text file asAwesome3DMovie.txt. - Make sure both files (the movie and the text file) are in the same folder on your phone (usually
/Oculus/Movies/3D).
It’s important to get the naming right. The Gear VR uses that text file to figure out how to display the movie correctly. If the names don’t match, or if the file isn’t in the right place, it won’t work. Think of it as giving the Gear VR a secret code to unlock the 3D magic.
Now, when you watch your Over/Under movie, it should display correctly in 3D! If not, double-check that text file and make sure everything is named correctly and in the right folder. Happy viewing!
Enhancing Your Movie Experience
Unlocking Netflix VOID Theater
Did you know you can watch Netflix in a cool, immersive way on your Gear VR? It’s true! The standard Netflix app puts you in a virtual theater, which is neat, but there’s a secret VOID mode that’s even better. To unlock it, just look straight up at a gray area within the Netflix app and tap the touchpad. This lets you watch movies in any position – lying down, sitting, whatever’s comfy. Plus, VOID mode uses less battery because it doesn’t have to render as much background, so you can watch longer!
Streaming Movies from Your Computer
Want to watch movies from your computer on your Gear VR? It’s totally doable. You’ll need a streaming app for this. There are a few options out there, but the basic idea is the same: you run a server app on your computer and a client app on your Gear VR. This lets you stream your movies over your home Wi-Fi network. It’s a great way to watch your entire movie collection without having to transfer files to your phone. I find it’s easier than constantly moving files around. Plus, you can use After Effects to create immersive video effects.
Here’s a quick rundown of the general steps:
- Install a streaming server on your computer (like Plex or similar).
- Install the corresponding client app on your Gear VR.
- Configure the server to share your movie folders.
- Connect to your server from the Gear VR app and start watching!
Hiding Videos from Your Library
Okay, so maybe you have some videos in your Oculus Video library that you’d rather not see every time you browse. Maybe they’re old home movies, test files, or something else. Luckily, it’s pretty easy to hide them. The Oculus Video app shows all the videos in your /Oculus/Movies/ folder. To hide a video, just create a new folder inside the /Oculus/Movies/ folder and move the video into it. The Oculus Video app won’t show videos that are inside subfolders. It’s a simple trick, but it keeps your library nice and clean. I like to keep things organized, so this is a lifesaver.
It’s worth noting that this only hides the videos from the Oculus Video app. They’re still on your phone’s storage, so you can access them with a file manager if you need to. This is more about decluttering the VR interface than actually deleting the files.
Advanced Gear VR Features
Streaming Your VR Experience to TV
Want to show others what you’re seeing in VR? You can! The Gear VR lets you stream your gameplay or movie watching directly to a TV. This is great for parties or just sharing the experience with family. You’ll need a compatible device like a Chromecast or a Samsung Smart TV. Just connect your phone and TV to the same Wi-Fi network, and then use the Oculus app to start streaming. It’s a simple way to make VR a more social activity.
Recording Your VR Sessions
Ever wanted to capture those epic moments in VR? Well, you can record your VR sessions! The Gear VR has a built-in recording feature that lets you save your gameplay or experiences. Here’s how to do it:
- Access the Oculus menu while in VR.
- Look for the recording option (it might be under settings or utilities).
- Start recording! A small icon will usually appear to indicate recording is in progress.
Keep in mind that recording can impact performance and battery life, so maybe do shorter clips. Also, the quality might not be perfect, but it’s still a cool way to share your VR experience with others.
Creating Your Own 360 Pictures
Beyond just watching content, you can also create your own! The Gear VR works with 360-degree cameras, letting you view and even create immersive photos. Imagine capturing a family vacation and then reliving it in VR! Here are some things to consider:
- Camera Choice: There are many 360 cameras available, from affordable options to professional-grade ones. Research which one fits your budget and needs.
- Stitching: Some cameras automatically stitch the images together, while others require software. Make sure you understand the stitching process before you buy.
- Viewing: Once you have your 360 picture, you can easily view it on your Gear VR through the Oculus Gallery or other compatible apps.
Creating 360 pictures is a fun way to personalize your VR experience. It allows you to capture memories and share them in a truly immersive way. It’s like stepping back into the moment, and it’s something that regular photos just can’t replicate.
Optimizing Audio and Battery Life
Getting Optimal Sound
The default audio from your phone’s speaker is okay, but it’s not great. For a truly immersive experience, headphones are a must. Consider using noise-canceling headphones to block out distractions. Bluetooth headphones work, but wired ones eliminate any potential latency issues. Experiment with different headphone types to find what sounds best to you. Also, make sure the headphone jack is clean; dust can sometimes interfere with the audio quality.
Improving Battery Life for Longer Sessions
VR can really drain your phone’s battery. Here are a few things you can do to extend your playtime:
- Plug it in! The Gear VR has a micro USB port on the bottom, so you can keep your phone charging while you’re using it. Just make sure you have a long enough cable so you don’t accidentally yank it out. This is probably the easiest solution.
- Lower the screen brightness. A brighter screen uses more power. You can adjust this in your phone’s settings. I’ve found that reducing the brightness can also help with eye strain.
- Close background apps. All those apps running in the background are using up battery life. Close them out before you start your VR session. You can go to your phone’s settings, then “Application”, then “Application Manager” to see running tasks and force stop them. Be careful not to stop any system processes, though!
- Turn on airplane mode. This will disable Wi-Fi and cellular data, which can also save battery life. Of course, you’ll need to download any streaming content beforehand.
Overheating can also be a problem, which also drains the battery faster. To combat this, try removing the backplate of the Gear VR to improve airflow. Some people even use small fans to keep their phones cool, but be careful not to introduce moisture.
Also, remember to take breaks! The official Oculus manual recommends breaks every 20 minutes. This is good for your eyes and your phone’s battery.
Conclusion
So, there you have it! Watching 3D movies on your Samsung Gear VR really isn’t that hard once you get the hang of it. It’s mostly about getting your files in the right spot and making sure they’re the correct type. This whole setup opens up a pretty cool way to watch movies, making it feel like you’re right there in the action. It’s a neat experience, and hopefully, this guide helped you get everything working smoothly. Enjoy your movie nights!
Frequently Asked Questions
Which Samsung phones work with the Gear VR?
The Samsung Gear VR works with specific Samsung Galaxy phones. Make sure your phone is one of the supported models, like the Galaxy Note 5, S6, S7, or newer versions that fit the headset.
How do I watch my own movies on the Gear VR?
You can watch your own movies by putting them in the right folder on your phone. Then, use the Oculus Video app on your Gear VR to pick your movie and even choose a cool virtual theater to watch it in.
What are the different types of 3D movie formats for Gear VR?
3D movies for Gear VR usually come in ‘Side-by-Side’ (SBS) or ‘Over/Under’ formats. SBS means the two images for 3D are next to each other, and Over/Under means one is on top of the other. The Gear VR needs to know which type it is to show it correctly.
Can I watch Netflix in a special mode on Gear VR?
Yes! The Netflix app on Gear VR has a special ‘VOID theater’ mode. If you look straight up in the app and tap the select button, you’ll enter this mode. It’s great for watching movies while lying down and can even save battery.
How can I make my movie watching experience better and save battery?
You can make your movie experience better by using good headphones for sound and by closing other apps on your phone to save battery. The VOID theater mode in Netflix also helps save battery because it uses less background graphics.
Can I show others what I’m seeing in my Gear VR or record it?
Yes, you can share what you’re seeing in your Gear VR! You can stream your VR view to a TV so others can see it, and you can also record your VR sessions to watch later or share with friends.
Oculus Rift Consumer Version Starts Shipping: What You Need to Know

So, the Oculus Rift Consumer Version is finally here, and people are talking. After a long wait, the price is out, and it’s got everyone wondering if it’s worth it. This article breaks down what you need to know about getting your hands on one, what it costs, and what comes with it. We’ll also touch on some of the early bumps in the road, like website issues, and what the future might hold for this new piece of tech. Get ready to dive into the world of virtual reality, but first, let’s look at the details.
Key Takeaways
- The Oculus Rift Consumer Version costs $599, plus shipping, with bundles including a PC starting at $1,499.
- Initial shipments begin in March, but pre-orders quickly sold out, pushing new orders to May.
- The Oculus Touch controllers are not included and will ship later in the year; pre-ordering the Rift reserves your spot for the Touch.
- The pre-order website experienced significant problems, which Oculus blamed on high traffic and fraud attempts.
- While the price is higher than the development kit, it fits the market for a non-mainstream, early-adopter VR product.
Oculus Rift Consumer Version Pricing
Initial Cost Of The Headset
Okay, so let’s talk money. The initial price tag for the Oculus Rift Consumer Version was $599, plus shipping. That’s a significant chunk of change, and it definitely raised some eyebrows when it was first announced. It’s important to remember that this was just the cost of the headset itself. You still needed a pretty beefy PC to actually run it. This price point positioned the Rift as a premium product right from the start.
Bundled PC Options
To address the need for a compatible PC, Oculus offered bundles that included both the Rift and a pre-built, “Oculus Ready” computer. These bundles started at around $1,499. While this made getting into VR easier, it also meant a substantial upfront investment. For many, this was the biggest barrier to entry. It’s worth noting that the Rift S offered a more affordable entry point later on.
International Pricing Details
For those outside the US, the pricing varied. In the UK, the Rift launched at £499. International pricing always involves currency conversion and import duties, which can make things a bit more expensive. Oculus initially shipped to 20 countries, with limited availability at select retailers starting in April. This phased rollout meant some regions had to wait longer and potentially pay more due to shipping and import costs.
The price of the Oculus Rift was a major talking point. It wasn’t just the cost of the headset; it was the entire ecosystem. A powerful PC, the headset itself, and eventually the Touch controllers all added up. This made VR a hobby for enthusiasts with deeper pockets, at least initially.
Shipping And Availability
Initial Shipping Timeline
So, the big question: when do you actually get your hands on the Oculus Rift? Well, the initial plan was to start shipping in March of 2016. I remember the excitement building up! People were refreshing their order pages like crazy, hoping to be among the first to experience VR at home. It was a pretty big deal. The Oculus Rift headset was priced at $599, and everyone was eager to get theirs.
Pre-Order Sell-Out
It didn’t take long for the pre-orders to sell out. I mean, we’re talking about a brand-new technology that everyone was hyped about. The demand was insane. If you weren’t quick enough, you were stuck waiting. This created a bit of a frenzy, with people checking constantly for updates and any chance to snag a pre-order spot. It was like trying to get tickets to a super popular concert – stressful, but worth it (hopefully!).
Global Rollout Plan
Oculus had a plan to roll out the Rift globally, but it wasn’t all smooth sailing. Different regions had different timelines, and some countries had to wait longer than others. This led to some frustration among international customers who felt left out. It’s always tricky managing a global launch, especially with a product as complex as the Rift. They had to deal with logistics, regulations, and all sorts of other challenges.
The global rollout was a phased approach, prioritizing certain markets based on factors like infrastructure and demand. While this strategy aimed to ensure a stable launch, it inevitably resulted in staggered availability, leaving some eager customers waiting longer than others. This is a common challenge with new tech releases, but it doesn’t make the wait any easier.
Here’s a simplified view of how the rollout might have looked:
- Phase 1: United States, Canada, United Kingdom, Germany
- Phase 2: Select European countries, Australia
- Phase 3: Asia, South America
- Phase 4: Other regions
Understanding The Oculus Touch Controller
Controller Release Schedule
So, the Oculus Rift is here, but what about those cool-looking Touch controllers? Well, they aren’t shipping with the initial Rift release. Oculus has said they’re aiming for a release in the second half of the year. That means early adopters will be stuck using the included Xbox One controller for a bit. It’s a bit of a bummer, because those controllers look like they’ll really make the VR experience more immersive. I’m hoping they stick to that second-half timeline.
Pre-Order Process For Touch
Oculus did something interesting with the Touch pre-orders. When you pre-ordered the Rift, you also reserved your spot in line for the Touch controllers. Basically, if you were first in line for the Rift, you were also first in line for the Touch. This was a smart move to reward early adopters and keep things fair. They weren’t taking any money for the Touch controllers until they shipped, which is a nice touch. It’s a good way to manage expectations and avoid charging people for something that isn’t immediately available. I wonder if they’ll do something similar for future accessories. You can use the OculusTouchController with the OpenXR interaction profile.
Current Interaction Methods
Right now, with just the Rift, you’re limited to using the Xbox One controller. It works, but it’s not ideal for VR. You can move around and interact with menus, but it lacks the precision and natural feel of motion controllers. It’s like trying to paint with a brick. The bundled software and games are designed with this in mind, so it’s not a complete disaster, but it definitely leaves you wanting more. We’re all waiting for the Touch controllers to really unlock the potential of VR interaction. Here’s what we’re stuck with for now:
- Xbox One Controller
- Head Tracking
- Limited Hand Presence
It’s a bit frustrating to have the Rift without the Touch controllers. It feels like only half the experience. I’m hoping the wait isn’t too long, because I’m really excited to see what developers can do with proper motion controls in VR. It’s going to be a game changer.
Pre-Order Website Challenges
Website Performance Issues
The launch of the Oculus Rift pre-orders wasn’t exactly smooth sailing. Many eager customers found themselves staring at error messages or experiencing painfully slow loading times. It seemed the website, despite running on Facebook’s infrastructure, struggled to handle the massive influx of users all trying to secure their early VR headset. The high demand, combined with the specific launch time, created a perfect storm that the servers just couldn’t weather. It was a frustrating experience for many who had been anticipating this moment for months.
Explanation For Site Woes
So, what went wrong? Oculus founder Palmer Luckey offered an explanation via Twitter, pointing the finger at “mass script kiddie fraud attempts.” Apparently, the system was under heavy load not just from legitimate pre-order attempts, but also from malicious actors trying to exploit the system. The credit card processing system was struggling to stay online amidst all the fraudulent activity. This added another layer of complexity to an already challenging situation, making it even harder for genuine customers to complete their orders.
Impact On Early Adopters
The website issues had a direct impact on those eager to be among the first to experience the Oculus Rift. Many potential early adopters faced:
- Missed pre-order windows due to site crashes.
- Uncertainty about whether their orders actually went through.
- Delays in receiving confirmation emails.
The rocky pre-order process left a sour taste in the mouths of some, raising questions about Oculus’s preparedness for the consumer launch. While the company addressed the issues and worked to resolve them, the initial experience undoubtedly created some frustration and disappointment among its most enthusiastic supporters.
Ultimately, the pre-order website challenges highlighted the difficulties of managing high demand and security threats simultaneously, especially when launching a highly anticipated product.
The Price Point Debate
Comparison To Development Kit
Okay, so the Oculus Rift consumer version is here, but that price tag… ouch. One of the first things people brought up was how much more expensive it is compared to the development kit. I remember when the dev kits were around $300-$350. Now we’re looking at almost double that. It’s a big jump, and it definitely made some early supporters raise an eyebrow. You have to wonder what accounts for the increase. Was it just inflation? Better components? Or something else entirely?
Public Reaction To Pricing
Let’s be real, the internet exploded when the price was announced. You couldn’t scroll through any social media feed without seeing someone complaining about the cost. Some people were saying it was way too much for what you get, while others were defending it, pointing out the tech involved. It’s safe to say there was no middle ground; people either loved it or hated it.
It’s interesting to see how different people value new technology. For some, being an early adopter is worth the high price. For others, it’s just not justifiable, especially when you consider all the other things you could buy with that money.
Market Positioning Of VR
Where does the Oculus Rift fit in the grand scheme of things? Is it a luxury item for tech enthusiasts, or is it trying to break into the mainstream? That’s the million-dollar question. At $600, it’s definitely not an impulse buy for most people. It puts VR in a weird spot. It’s not quite accessible to everyone, but it’s also not so expensive that it’s completely out of reach. It’ll be interesting to see how this pricing impacts VR adoption in the long run.
What Comes With The Rift
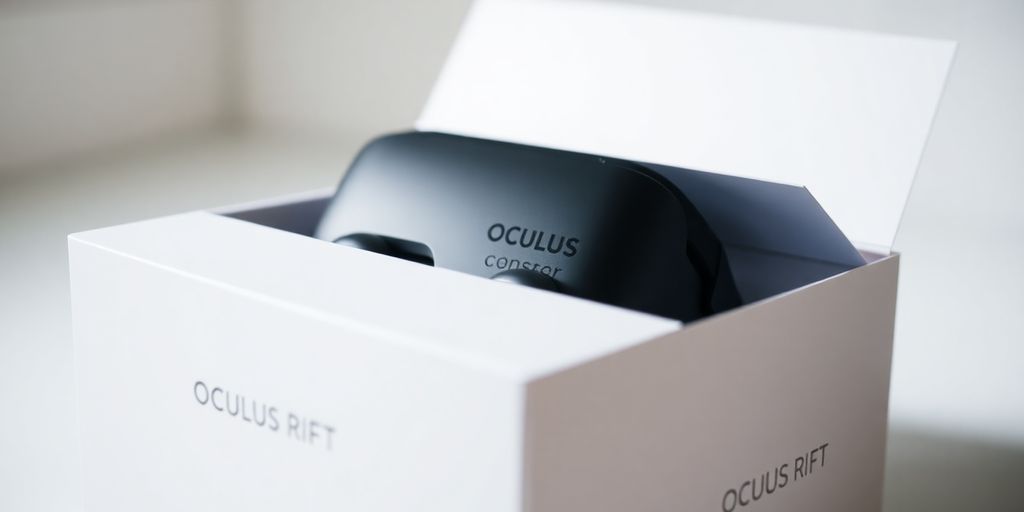
Included Accessories
So, you’ve pre-ordered your Oculus Rift, and you’re probably wondering what goodies come in the box. Well, let’s break it down. The Rift CV1 isn’t just the headset itself; it’s a whole VR experience in a box. You get the headset, of course, but also a sensor to track your movement, and cables to connect it all to your PC. It also comes with the integrated 3D audio headphones, which are removable if you prefer to use your own.
Bundled Software
It’s not just hardware, though. Oculus throws in some software to get you started. You’ll find a selection of VR games and experiences ready to go. This is great because it means you can jump into VR right away without having to buy a bunch of stuff first. The bundled software is designed to show off what the Rift can do, from immersive gaming to cool interactive experiences.
Minimum PC Requirements
Before you get too excited, let’s talk about the elephant in the room: your PC. The Oculus Rift needs a pretty powerful computer to run smoothly. Here’s a quick rundown of what you’ll need:
- A decent processor (Intel i5-4590 or better).
- A solid graphics card (NVIDIA GTX 970 / AMD R9 290 or better).
- At least 8GB of RAM.
- Compatible ports.
If your PC doesn’t meet these requirements, you’re going to have a bad time. VR is demanding, and a weak PC will lead to lag, stuttering, and motion sickness. So, double-check your specs before you even think about unboxing that Rift. You might need to consider an Oculus Ready PC.
Alternative Uses For $600
So, you’re looking at the Oculus Rift and thinking, “$600?” That’s a fair reaction. Let’s explore some other things you could do with that kind of money. It’s not just about tech; it’s about choices.
High-End Smartphone Comparison
For $600, you could get a pretty decent smartphone. Not the absolute top-of-the-line, but something that will handle your calls, texts, photos, and social media without a problem. You might even find a gently used flagship model from last year. The question is, do you need the latest and greatest, or would a solid, reliable phone do the trick? It really depends on your priorities. Some people would rather have a phone with all the bells and whistles, while others are perfectly happy with something more basic. It’s all about what you value.
Other Tech Gadget Equivalents
Instead of the Rift, you could diversify your tech collection. Here are a few ideas:
- A nice pair of noise-canceling headphones for immersive music or focused work.
- A smartwatch to track your fitness and stay connected on the go.
- A decent tablet for reading, watching videos, or light work.
Spending $600 on tech is a big decision. Think about what you’ll actually use and enjoy. Don’t just buy something because it’s new and shiny. Consider your needs and choose wisely.
Investment Opportunities
Okay, let’s get a little more practical. Instead of spending the money, you could invest it. While $600 isn’t going to make you rich overnight, it’s a start. You could put it into a high-yield savings account and earn some interest, or invest in a few shares of stock. It’s all about playing the long game. Investing early, even with small amounts, can make a big difference over time.
Here’s a simple comparison:
| Option | Potential Return | Risk Level | Liquidity |
|---|---|---|---|
| Oculus Rift | Entertainment | Low | Low |
| Savings Account | Low | Very Low | High |
| Stock Market | Variable | Medium | Medium |
Ultimately, the best choice depends on your individual circumstances and goals. Are you looking for fun and entertainment, or are you trying to build wealth for the future?
Conclusion
So, the Oculus Rift is finally here, or at least it’s starting to ship. It’s been a long time coming, and people are definitely excited. But, as we’ve seen, it’s not exactly cheap, and you need a pretty good computer to run it. Plus, the special controllers aren’t even out yet. It’s clear that virtual reality is still pretty new, and it’s not for everyone right now. Only time will tell if the Rift can really take off, or if it’s just for the early birds who are willing to spend the money.
Frequently Asked Questions
How much does the Oculus Rift cost?
The Oculus Rift consumer version is priced at $599, not including shipping. For those in the U.K., it costs £499.
When will the Oculus Rift be available?
The Oculus Rift started shipping in March. However, due to high demand, pre-orders quickly sold out, and new orders might not ship until May.
Do I need a special computer for the Rift?
Yes, you will need a powerful computer to run the Oculus Rift. If you don’t have one, Oculus will offer special ‘Oculus Ready’ PC bundles starting at $1,499 in February.
When can I get the Oculus Touch controllers?
The Oculus Touch controllers, which let you interact with virtual objects, will not ship at the same time as the headset. They are expected to come out in the second half of the year. When you pre-order the Rift, you can also sign up to be in line for the Touch controllers.
Why were there problems with the pre-order website?
The pre-order website faced some issues, with many people reporting problems. Oculus founder Palmer Luckey explained that the site was dealing with a huge number of visitors and even attempts by fraudsters.
Is the Oculus Rift too expensive?
The $600 price tag for the Rift has caused some discussion. It’s much more expensive than the earlier developer version, which was $350. While some people think it’s too much, others believe it’s fair for a new and advanced technology like virtual reality.
Unboxing and Review: The Samsung Gear 360 Camera for Immersive VR

So, you’ve heard about virtual reality, right? It’s pretty cool. And to really get into it, you need a way to make your own immersive stuff. That’s where cameras like the Samsung Gear 360 come in. It’s supposed to let you capture everything around you, making it feel like you’re right back there when you watch it later, especially with a Gear VR headset. I’ve been checking out this camera, and I’m going to tell you all about what it’s like to actually use it, from the moment you open the box to how well it captures your world. You can find more info on this camera at http://vrheadsets3d.com:80/gear-vr/samsung-gear-360-camera/.
Key Takeaways
- The Samsung Gear 360 comes in a neat package with all the basic accessories you need to get started.
- It’s built to be small and tough, so you can take it with you without worrying too much.
- The camera uses two lenses to capture everything around you in full 360 degrees, and it works well with Samsung’s VR gear.
- Pictures and videos from the Gear 360 are pretty clear, and the camera does a good job putting them together.
- It’s easy to use, connects wirelessly, and makes sharing your 360 content simple.
Unboxing the Samsung Gear 360
First Impressions of the Packaging
Okay, so the Gear 360 arrived, and the first thing I noticed was the packaging. It’s not just some throwaway box; it’s a pretty sturdy cylindrical plastic case. I’m actually keeping it to store the camera when I’m not using it. It feels like Samsung put some thought into making the unboxing experience a bit more premium. Getting into it was a bit of a struggle, though. The tape holding the two halves together is strong, and I almost ripped the cardboard wrapping trying to get it open. So, word of advice: be careful if you’re a packaging perfectionist.
What’s Included in the Box
Samsung didn’t skimp on the accessories, which is a nice surprise. Here’s what you get:
- The Gear 360 camera itself (obviously).
- A mini tripod – it’s surprisingly sturdy.
- A carry bag to keep it safe on the go.
- Cleaning wipes (those lenses are fingerprint magnets!).
- A charger and a battery.
- A camera strap.
It’s a pretty complete package, and you’re ready to start shooting right away. I appreciate that they included the little things like the cleaning wipes; it shows they know how the camera will be used.
Also, there’s a small instruction booklet with a unique product code. Don’t lose this! You need it to download the Gear 360 action director, which is the software you use to manage and edit your 360 videos on your computer. Speaking of other 360 cameras, the 360fly 4K camera is another option to consider.
Initial Setup and Accessories
Setting up the Gear 360 is pretty straightforward. The camera comes already attached to its mini tripod, which is convenient. The design is simple, with only a few buttons and a small LCD screen. It’s clearly designed to be used with the companion app, but you can still change settings manually. The power button also acts as the back key in the menu. The camera activates quickly with a flash of the LCD screen and some beeps. The mini tripod is nice, but any standard tripod or selfie stick will work with the Gear 360, which is great for flexibility. The included accessories, like the carry bag, are a nice touch and make it easy to take the camera with you on the go.
Design and Build Quality
Compact and Portable Form Factor
The Samsung Gear 360 really nails the portability aspect. It’s small enough to toss in your bag without a second thought, which is great if you’re planning on taking it with you on trips or just want something you can easily carry around. I was surprised by how lightweight it is; it doesn’t feel like it’ll weigh you down at all. This makes it super convenient for capturing 360 content on the go without needing a bulky setup.
Durable Construction for On-the-Go Use
The Gear 360 feels surprisingly robust, which is reassuring considering its intended use. It doesn’t feel cheap or flimsy. The materials seem like they can handle a bit of rough handling, which is important if you’re using it for travel or outdoor activities. I wouldn’t go throwing it around, but it definitely seems like it can withstand everyday wear and tear. One user mentioned that the seals around the ports feel well made, which is a good sign for its overall durability.
Ergonomics and Handling
Using the Gear 360 is pretty straightforward. It fits comfortably in your hand, and the button placement is intuitive. You don’t need to be a tech expert to figure out how to start recording or take a photo. The design makes it easy to hold steady, which is important for getting clear high-resolution photo and video. Here are a few things I noticed:
- Easy to grip
- Buttons are easily accessible
- Lightweight design reduces fatigue
The Gear 360’s design prioritizes ease of use. It’s clear that Samsung wanted to create a camera that anyone could pick up and start using without a steep learning curve. The simple controls and comfortable grip make it a pleasure to use, even for extended periods.
Key Features for Immersive VR
The Samsung Gear 360 isn’t just another camera; it’s a portal to creating truly immersive virtual reality experiences. It packs some serious tech to make capturing and sharing 360° content a breeze. Let’s break down the key features that make this camera a standout.
Dual 180-Degree Lenses for True 360 Capture
The heart of the Gear 360 lies in its dual 180-degree lenses. These lenses work in tandem to capture a complete 360° view of your surroundings. This means you can record everything around you simultaneously, eliminating blind spots and creating a truly immersive experience. The camera then stitches these two images together to create a seamless 360° image or video. It’s pretty cool how it all comes together.
High-Resolution Photo and Video Capabilities
Resolution is key when it comes to VR, and the Gear 360 doesn’t disappoint. It’s capable of capturing high-resolution photos and videos, ensuring that your VR experiences are sharp and detailed. The exact resolution varies depending on the model, but you can expect to capture footage that looks great on VR headsets and other devices. I’ve found that the higher the resolution, the more realistic and engaging the VR experience becomes. The Samsung Gear 360 camera offers users an immersive content experience.
Seamless Integration with Gear VR and Galaxy Smartphones
One of the biggest advantages of the Gear 360 is its seamless integration with other Samsung products, especially the Gear VR headset and Galaxy smartphones. This integration makes it incredibly easy to view, edit, and share your 360° content.
Here’s how it works:
- Easy Viewing: Simply pop your Galaxy smartphone into the Gear VR, and you can instantly view your 360° photos and videos in a fully immersive environment.
- Simple Editing: The Gear 360 app on your Galaxy smartphone allows you to easily edit your 360° content, add effects, and share it with others.
- Direct Sharing: You can directly upload your 360° content to social media platforms like Facebook and YouTube, allowing your friends and family to experience your memories in a whole new way.
The tight integration between the Gear 360, Gear VR, and Galaxy smartphones creates a streamlined workflow for creating and enjoying VR content. It’s a big plus for anyone already invested in the Samsung ecosystem. It’s a pretty good way to capture 360 video in the racecar on track.
Performance and Image Quality
Sharpness and Clarity of 360 Photos
Okay, so let’s talk about how these 360 photos actually look. I was honestly pretty impressed. The sharpness is surprisingly good, especially in well-lit environments. You can really zoom in and still see a decent amount of detail. Of course, it’s not going to compete with a high-end DSLR, but for a little 360 camera, it holds its own. The colors are vibrant, and the images are generally pleasing to the eye. I took some shots of my backyard, and you can clearly see the individual leaves on the trees. Not bad at all!
Video Stitching and Playback Experience
Now, video is where things get a little more interesting. The stitching, which is where the images from the two lenses are combined, is generally pretty good. You’ll notice some slight imperfections if you’re really looking for them, especially with moving objects close to the camera. But overall, it’s pretty seamless. Playback is smooth, especially if you’re viewing it on a compatible device like a Gear VR. I did notice some stuttering when trying to watch the videos on my older laptop, so keep that in mind. Here’s a quick rundown:
- Stitching is mostly seamless.
- Playback is smooth on newer devices.
- Older devices might struggle.
Low-Light Performance Considerations
Low-light performance is where the Gear 360 starts to show its limitations. It’s not terrible, but you’ll definitely notice more noise and graininess in the images and videos. The colors also tend to get a bit washed out. If you’re planning on shooting a lot indoors or in dimly lit environments, you might want to consider investing in some extra lighting. It makes a big difference. I tried taking some photos at a concert, and while they were okay, they weren’t exactly stunning. It’s usable, but not ideal.
Honestly, the low-light performance is probably the biggest drawback of this camera. It’s fine for casual use, but if you’re serious about 360 photography, you might want to look at something with a larger sensor.
User Experience and Connectivity
Intuitive Controls and App Interface
Using the Gear 360 is pretty straightforward. The camera itself has a few buttons, but honestly, you’ll probably be using the app most of the time. The app is where you can really control everything, from shooting modes to settings. It’s laid out in a way that makes sense, even if you’re not a tech whiz. I didn’t have to spend hours figuring out how to change the resolution or switch between single and dual lens modes. It’s all right there, easy to find.
Wireless Connectivity Options
Connecting the Gear 360 to your phone or computer is simple. It uses Wi-Fi Direct, which is nice because you don’t need an internet connection to transfer files. Plus, it has Bluetooth, which helps with the initial setup and remote control. I found the Wi-Fi transfer speeds to be decent, not blazing fast, but good enough for transferring those big 360 videos. Here’s a quick rundown:
- Wi-Fi Direct: For direct file transfer.
- Bluetooth: For initial setup and remote control.
- USB: For wired connection and charging.
Ease of Sharing 360 Content
Sharing your 360 masterpieces is where things get interesting. You can upload directly to Facebook, YouTube, and other platforms that support 360 videos. The app also lets you convert the 360 footage into regular videos or photos, which is handy for sharing on platforms that don’t support 360. I did find that the processing time for converting videos can be a bit long, especially for longer clips. But overall, the sharing process is pretty painless. If you need to pair a Meta Quest, you can download the app to guide you through the process.
The best part about the Gear 360 is how it fits into the Samsung ecosystem. If you’ve got a Galaxy phone and a Gear VR headset, everything just works together. It’s not perfect, but it’s a pretty smooth experience compared to some other 360 cameras I’ve tried.
Real-World Applications and Use Cases
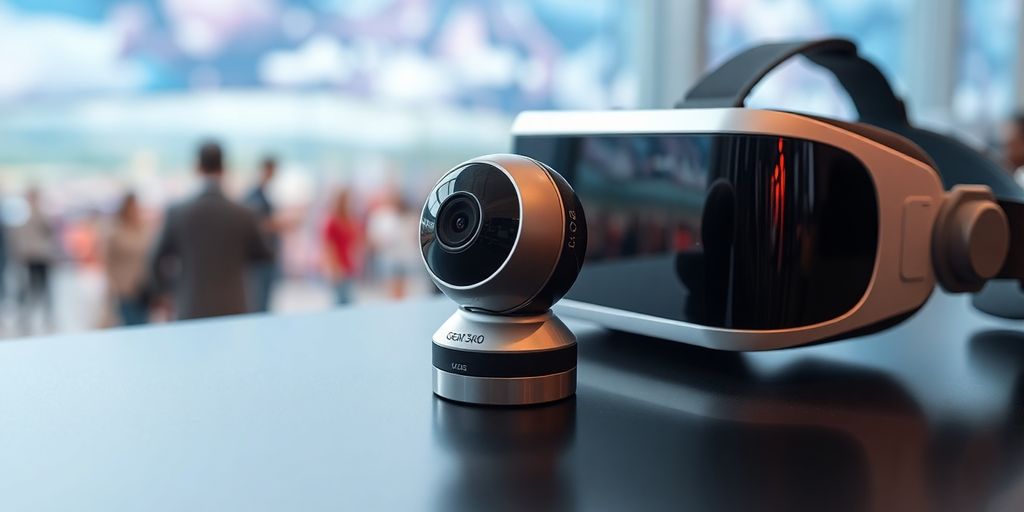
The Samsung Gear 360 isn’t just a cool gadget; it’s a tool that can change how we capture and share experiences. Let’s look at some ways you can use it.
Capturing Travel Memories in 360
Imagine reliving your vacation not just by looking at photos, but by stepping back into the scene. The Gear 360 lets you capture entire environments, making your travel memories far more immersive. Forget static landscapes; now you can record bustling markets, serene beaches, or historical landmarks in all directions. When you share these experiences, your friends and family can feel like they’re right there with you. I took mine to the Grand Canyon, and it was amazing to see the whole thing later in VR. It’s way better than just a regular picture.
Creating Immersive Home Videos
Home videos don’t have to be boring anymore. With the Gear 360, you can record family gatherings, birthday parties, or even just a regular day at home in a way that truly captures the moment. Think about it: instead of just seeing a slice of the action, you can see everyone interacting, the decorations, and the overall atmosphere. It’s like being there again, and it’s a fantastic way to preserve memories for future generations. I used it at my kid’s birthday, and it was wild to see what everyone was doing at the same time. You can even use 360 camera software to edit the videos.
Exploring Creative Possibilities with 360 Content
Beyond personal use, the Gear 360 opens up a world of creative possibilities. Consider these ideas:
- Virtual Tours: Create virtual tours of real estate properties, museums, or even your own home. This is great for remote viewings or showcasing spaces online.
- Event Coverage: Capture events like concerts, conferences, or weddings in 360 degrees, offering attendees a unique way to relive the experience.
- Educational Content: Produce immersive educational videos for subjects like history, science, or geography. Imagine exploring ancient ruins or dissecting a frog in VR!
The Gear 360 is more than just a camera; it’s a portal to creating and sharing immersive experiences. Whether you’re capturing travel memories, creating home videos, or exploring creative possibilities, this device can transform how you see and share the world. It’s a fun way to experiment with new media and engage your audience in a whole new way.
Comparing with Other 360 Cameras
Value Proposition of the Samsung Gear 360
When the Samsung Gear 360 first hit the market, it was a pretty big deal. It offered a relatively affordable entry point into the world of 360-degree content creation, especially when compared to some of the higher-end professional rigs. Its value proposition hinged on ease of use and accessibility for the average consumer. It wasn’t necessarily about having the absolute best image quality, but more about making 360 content creation simple and fun. It was a good option for people who wanted to experiment with VR without breaking the bank. The original Gear 360 had compatibility issues, but the 2017 Gear 360 improved on this.
Advantages for Gear VR Users
If you were already invested in the Samsung ecosystem, particularly with a Gear VR headset and a compatible Galaxy smartphone, the Gear 360 was a no-brainer. The integration was incredibly smooth. You could easily shoot 360 photos and videos, then pop your phone into the Gear VR and instantly view your creations in an immersive environment. Sharing to social media was also pretty straightforward, making it easy to show off your 360 adventures to friends and family. It was a closed ecosystem, sure, but it was a very convenient one. The higher photo quality was a plus.
Considerations for Different User Needs
Not everyone needs the same thing from a 360 camera. If you’re a professional videographer or photographer, the Gear 360 probably wasn’t going to cut it. The image quality, while decent, wasn’t on par with more expensive, professional-grade cameras. However, for casual users, travelers, or anyone just wanting to dip their toes into 360 content, the Gear 360 offered a good balance of features and price. It really came down to what you were planning to use it for and how serious you were about 360 content creation. The most affordable 4K 360 camera was a good option for some.
Ultimately, the Samsung Gear 360 carved out a niche for itself by being user-friendly and accessible. It wasn’t the most powerful or feature-rich 360 camera on the market, but it made 360 content creation approachable for a wider audience. Whether it’s the right choice for you depends on your specific needs and budget, but it’s definitely worth considering if you’re looking for an easy way to get started with immersive VR content.
Final Thoughts on the Samsung Gear 360
So, after spending some real time with the Samsung Gear 360, it’s pretty clear this little camera has a lot going for it. It’s easy to use, which is a big plus for anyone just getting into 360-degree video. The quality of the footage is good, especially when you consider how small and portable this thing is. Sure, it’s not perfect, no camera is. But for capturing those moments you want to relive in a totally new way, it does a solid job. If you’re looking to jump into VR content without breaking the bank, the Gear 360 is definitely worth checking out. It’s a fun piece of tech that opens up some cool creative possibilities.
Frequently Asked Questions
What exactly is the Samsung Gear 360 Camera?
The Samsung Gear 360 is a small, round camera that can record videos and take pictures all around you, in a full 360-degree view. It’s made to work really well with Samsung’s VR headset, the Gear VR, and Galaxy phones, so you can easily watch your immersive content.
Is the Samsung Gear 360 easy to use?
Yes, it’s pretty simple! The camera has just a few buttons, and you can control it easily using an app on your Samsung Galaxy smartphone. It connects wirelessly, making it easy to start recording or snapping photos.
How does the Gear 360 capture a full 360-degree view?
The camera has two special lenses, each covering 180 degrees. When you record, it stitches these two views together to create one seamless 360-degree picture or video. This makes it feel like you’re really there when you watch it back.
What’s the quality of the pictures and videos like?
The Gear 360 takes very clear photos and videos. When you view them with a Gear VR headset, it feels incredibly real, almost like you’re stepping back into the moment you recorded. It’s great for reliving memories.
Can I use this camera for more than just fun videos?
Absolutely! The Gear 360 is awesome for capturing your trips, making cool home videos, or just exploring new ways to tell stories with immersive content. It lets you share experiences in a way that regular cameras can’t.
How does the Samsung Gear 360 compare to other 360 cameras?
The Gear 360 is a fantastic choice, especially if you already own a Samsung Galaxy phone and a Gear VR headset, because they work together so smoothly. It offers a great balance of features and ease of use for anyone wanting to get into 360-degree content.