Watch 3D Movies on Samsung Gear VR: Your Ultimate Guide

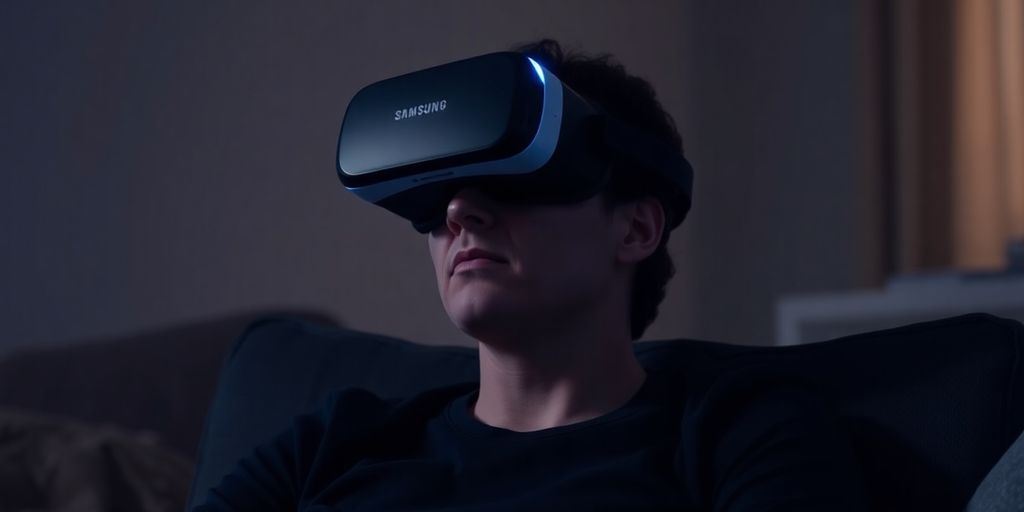
So, you’ve got a Samsung Gear VR and you’re ready to dive into some awesome 3D movies? That’s a great choice! Getting your own personal cinema set up is actually pretty simple. Whether you’re just starting out or looking to get the most from your headset, this guide will walk you through everything you need to know to watch your favorite films in a whole new way. Let’s get your virtual movie night going!
Key Takeaways
- Make sure your Samsung phone is compatible with the Gear VR before you start.
- The Oculus Video app is your main tool for watching movies on the Gear VR.
- Know the difference between Side-by-Side and Over/Under 3D video formats for best viewing.
- You can stream movies from your computer to your Gear VR for more options.
- Adjusting sound and managing battery life will make your movie sessions better.
Setting Up Your Gear VR
So, you’re ready to jump into the world of VR with your Samsung Gear VR? Awesome! Getting everything set up correctly is super important for a good experience. Let’s walk through it.
Compatible Samsung Galaxy Smartphones
First things first, you need to make sure you have a compatible phone. The Gear VR isn’t universal; it only works with certain Samsung Galaxy models. Using an incompatible phone can damage both the phone and the headset, so double-check! Here’s a quick list of phones that are generally compatible:
- Samsung Galaxy S6
- Samsung Galaxy S6 Edge
- Samsung Galaxy S6 Edge+
- Samsung Galaxy S7
- Samsung Galaxy S7 Edge
- Samsung Galaxy Note 5
- Samsung Galaxy S8
- Samsung Galaxy S8+
- Samsung Galaxy Note 8
- Samsung Galaxy S9
- Samsung Galaxy S9+
- Samsung Galaxy Note 9
- Samsung Galaxy S10 series (S10e, S10, S10+)
Keep in mind that this list might not be exhaustive, and compatibility can change with software updates. Always refer to the official Samsung Gear VR product FAQs for the most up-to-date information.
Initial Software Installation
Okay, phone compatibility confirmed? Great! Now, let’s get the software installed. The first time you plug your compatible phone into the Gear VR headset, the Oculus software should automatically start installing. If it doesn’t, make sure your phone is unlocked and that you’ve allowed the Gear VR service to access your phone. You’ll need a few things:
- Oculus Account: You’ll need to create an Oculus account (if you don’t already have one) and log in. This is how you’ll access the Oculus store and your VR content.
- Wi-Fi Connection: Make sure your phone is connected to a stable Wi-Fi network. The initial software download can be pretty big, and you don’t want to burn through all your mobile data.
- Patience: The installation process can take a little while, so just let it do its thing. Don’t interrupt it, or you might have to start over.
It’s a good idea to close all other apps running in the background on your phone before starting the installation. This frees up resources and can help the process go a bit faster. Also, make sure your phone is charged or plugged in, just in case.
Optimizing Image Quality
Alright, software’s installed, and you’re almost ready to go! But before you jump in, let’s talk about getting the best possible image quality. A blurry or uncomfortable image can really ruin the VR experience. Here are a few things to tweak:
- Focus Wheel: The Gear VR has a focus adjustment wheel on the top. Use this to fine-tune the image until it’s crystal clear for your eyes. Everyone’s vision is different, so take your time to get it just right.
- Headset Positioning: Even with the focus wheel adjusted, the position of the headset on your face can make a big difference. Try tilting the headset slightly forward or backward to find the sweet spot.
- Cleanliness: This might sound obvious, but make sure the lenses inside the Gear VR are clean! Dust, smudges, or fingerprints can seriously degrade the image quality. Use a microfiber cloth to gently wipe them clean.
Getting the image quality dialed in is worth the effort. A sharp, clear picture will make your VR experiences much more immersive and enjoyable. Now you’re ready to start watching downloaded videos!
Mastering Gear VR Controls
Okay, so you’ve got your Gear VR all set up. Now what? It’s time to learn how to actually use the thing. Don’t worry, it’s not rocket science, but there are a few things you should know to get the most out of your experience.
Understanding the Touchpad Controller
The touchpad is your main way of interacting with the VR world. Think of it as your mouse and keyboard all rolled into one. It’s located on the right side of the headset, and you use your finger to swipe and tap. A single tap is usually ‘select’ or ‘enter’, while swiping lets you scroll through menus or move around in some games. Some apps also use multi-finger gestures, but those are less common. It might feel a little awkward at first, but you’ll get the hang of it pretty quickly. I remember when I first got mine, I kept accidentally hitting the back button, but now it’s second nature.
Navigating Menus with Ease
Once you’re in the Oculus Home screen, you’ll see a bunch of different options. Looking around with your head moves the cursor, and you use the touchpad to select things. Most menus are pretty straightforward, but sometimes it can be tricky to find what you’re looking for. A good tip is to take your time and really look around. The menus are designed to be immersive, so sometimes the option you want is hidden in plain sight. Also, don’t be afraid to experiment! You can’t really break anything, so just try tapping on different things to see what they do.
Returning to the Main Menu
Getting back to the main menu is super important, especially when you’re switching between apps or movies. There’s a dedicated back button located right above the touchpad. Just give it a tap, and you’ll be whisked away to the Oculus Home. If you’re ever lost or confused, just remember: back button to the rescue! It’s like the panic button of the VR world. I’ve definitely used it a few times when I got stuck in some weird settings menu. It’s also worth noting that some apps have their own in-app menus, so you might need to exit those first before you can get back to the main Oculus menu. It’s a bit like having menus within menus, but once you understand the hierarchy, it becomes pretty easy to manage.
Mastering the Gear VR controls is key to enjoying your VR experience. Take some time to practice and get comfortable with the touchpad and button placements. Once you do, you’ll be navigating the virtual world like a pro in no time.
Watching Your Own Movies
So, you’ve got your Gear VR all set up and you’re ready to watch your own movies? Awesome! It’s actually pretty straightforward. Let’s get into how to do it.
Using the Oculus Video Application
The Oculus Video app is your go-to for watching your own stuff. It comes pre-installed, so you don’t have to worry about downloading anything extra. This app is designed to recognize and play your video files, whether they’re regular, 3D, or even 360° videos. Just make sure your videos are in a compatible format (MP4 is usually a safe bet). I’ve had some issues with older AVI files, so keep that in mind. To get started:
- Open the Oculus app on your phone.
- Put on your Gear VR.
- Navigate to the “Video” section using the touchpad.
Selecting Your Video Library
Once you’re in the Oculus Video app, you’ll see a few options, like streaming services and stuff. But what we want is your own video library. Look for something like “My Videos” or “Your Videos” – it might be at the bottom of the list. Tap on that, and it should bring up all the videos that are stored on your phone. If you don’t see your videos, double-check that they’re in the right folder. The Gear VR usually looks in the /Oculus/Movies/ folder. You might need to transfer the videos from your computer to that folder using a USB cable.
Choosing a Virtual Theater
Okay, this is where it gets kinda cool. The Oculus Video app lets you pick a virtual environment to watch your movie in. You can watch your movie in a home theater, on the moon, or even in a creepy void. It’s all about what kind of vibe you’re going for. Each theater has a different feel, and some even have different lighting. Experiment and see which one you like best! I personally like the home theater for most movies, but the void is fun for horror flicks. Once you’ve picked your theater, just select your movie and hit play. Enjoy the show!
Watching movies in VR is a really cool experience. It’s like having your own private cinema. The immersion is great, and it really helps you get lost in the movie. Just remember to take breaks every now and then, because staring at a screen that close can get tiring after a while.
Downloading 3D Movies for Gear VR
So, you’re ready to watch some awesome 3D movies on your Gear VR? Great! But first, you need to get those movies onto your phone in a format the Gear VR can understand. It’s not too hard, but there are a few things you should know.
Understanding 3D Video Formats
Okay, let’s talk about 3D video formats. The two main types you’ll encounter are Side-by-Side (SBS) and Over/Under (also called Top/Bottom). Basically, these formats cram two slightly different views of the same scene into one video file – one view for each eye, creating the 3D effect. It’s like those old View-Master toys, but digital!
- Side-by-Side (SBS): The left and right eye views are placed next to each other horizontally.
- Over/Under (Top/Bottom): The left and right eye views are stacked vertically.
- Full SBS: Maintains the full resolution for each eye.
- Half SBS: Halves the horizontal resolution for each eye to save space.
Side-by-Side Versus Over/Under
So, which format is better? Well, it depends. Side-by-Side is generally more common, but Over/Under can sometimes offer better image quality, especially if the original source is high-resolution. The Gear VR handles both, but you might need to tweak some settings, which we’ll get to in a sec. Think of it like choosing between different types of popcorn – both are good, but they have their own unique qualities. If you want to play 3D Blu-ray movies, you’ll need to convert them to one of these formats first.
Configuring Over/Under Movies
Here’s the thing: the Gear VR automatically assumes that all 3D movies in your “3D” folder are in SBS format. If you’ve got an Over/Under movie, you need to tell it! Otherwise, it’ll look all wonky and not-3D-ish at all. It’s like trying to wear your shoes on the wrong feet – uncomfortable and just plain wrong.
Here’s how to do it:
- Open Notepad (or any plain text editor).
- Copy and paste the following code:
{
"format": "3DTB"
}
- Save the file with the EXACT same name as your movie file, but with a
.txtextension. For example, if your movie is calledAwesome3DMovie.mp4, save the text file asAwesome3DMovie.txt. - Make sure both files (the movie and the text file) are in the same folder on your phone (usually
/Oculus/Movies/3D).
It’s important to get the naming right. The Gear VR uses that text file to figure out how to display the movie correctly. If the names don’t match, or if the file isn’t in the right place, it won’t work. Think of it as giving the Gear VR a secret code to unlock the 3D magic.
Now, when you watch your Over/Under movie, it should display correctly in 3D! If not, double-check that text file and make sure everything is named correctly and in the right folder. Happy viewing!
Enhancing Your Movie Experience
Unlocking Netflix VOID Theater
Did you know you can watch Netflix in a cool, immersive way on your Gear VR? It’s true! The standard Netflix app puts you in a virtual theater, which is neat, but there’s a secret VOID mode that’s even better. To unlock it, just look straight up at a gray area within the Netflix app and tap the touchpad. This lets you watch movies in any position – lying down, sitting, whatever’s comfy. Plus, VOID mode uses less battery because it doesn’t have to render as much background, so you can watch longer!
Streaming Movies from Your Computer
Want to watch movies from your computer on your Gear VR? It’s totally doable. You’ll need a streaming app for this. There are a few options out there, but the basic idea is the same: you run a server app on your computer and a client app on your Gear VR. This lets you stream your movies over your home Wi-Fi network. It’s a great way to watch your entire movie collection without having to transfer files to your phone. I find it’s easier than constantly moving files around. Plus, you can use After Effects to create immersive video effects.
Here’s a quick rundown of the general steps:
- Install a streaming server on your computer (like Plex or similar).
- Install the corresponding client app on your Gear VR.
- Configure the server to share your movie folders.
- Connect to your server from the Gear VR app and start watching!
Hiding Videos from Your Library
Okay, so maybe you have some videos in your Oculus Video library that you’d rather not see every time you browse. Maybe they’re old home movies, test files, or something else. Luckily, it’s pretty easy to hide them. The Oculus Video app shows all the videos in your /Oculus/Movies/ folder. To hide a video, just create a new folder inside the /Oculus/Movies/ folder and move the video into it. The Oculus Video app won’t show videos that are inside subfolders. It’s a simple trick, but it keeps your library nice and clean. I like to keep things organized, so this is a lifesaver.
It’s worth noting that this only hides the videos from the Oculus Video app. They’re still on your phone’s storage, so you can access them with a file manager if you need to. This is more about decluttering the VR interface than actually deleting the files.
Advanced Gear VR Features
Streaming Your VR Experience to TV
Want to show others what you’re seeing in VR? You can! The Gear VR lets you stream your gameplay or movie watching directly to a TV. This is great for parties or just sharing the experience with family. You’ll need a compatible device like a Chromecast or a Samsung Smart TV. Just connect your phone and TV to the same Wi-Fi network, and then use the Oculus app to start streaming. It’s a simple way to make VR a more social activity.
Recording Your VR Sessions
Ever wanted to capture those epic moments in VR? Well, you can record your VR sessions! The Gear VR has a built-in recording feature that lets you save your gameplay or experiences. Here’s how to do it:
- Access the Oculus menu while in VR.
- Look for the recording option (it might be under settings or utilities).
- Start recording! A small icon will usually appear to indicate recording is in progress.
Keep in mind that recording can impact performance and battery life, so maybe do shorter clips. Also, the quality might not be perfect, but it’s still a cool way to share your VR experience with others.
Creating Your Own 360 Pictures
Beyond just watching content, you can also create your own! The Gear VR works with 360-degree cameras, letting you view and even create immersive photos. Imagine capturing a family vacation and then reliving it in VR! Here are some things to consider:
- Camera Choice: There are many 360 cameras available, from affordable options to professional-grade ones. Research which one fits your budget and needs.
- Stitching: Some cameras automatically stitch the images together, while others require software. Make sure you understand the stitching process before you buy.
- Viewing: Once you have your 360 picture, you can easily view it on your Gear VR through the Oculus Gallery or other compatible apps.
Creating 360 pictures is a fun way to personalize your VR experience. It allows you to capture memories and share them in a truly immersive way. It’s like stepping back into the moment, and it’s something that regular photos just can’t replicate.
Optimizing Audio and Battery Life
Getting Optimal Sound
The default audio from your phone’s speaker is okay, but it’s not great. For a truly immersive experience, headphones are a must. Consider using noise-canceling headphones to block out distractions. Bluetooth headphones work, but wired ones eliminate any potential latency issues. Experiment with different headphone types to find what sounds best to you. Also, make sure the headphone jack is clean; dust can sometimes interfere with the audio quality.
Improving Battery Life for Longer Sessions
VR can really drain your phone’s battery. Here are a few things you can do to extend your playtime:
- Plug it in! The Gear VR has a micro USB port on the bottom, so you can keep your phone charging while you’re using it. Just make sure you have a long enough cable so you don’t accidentally yank it out. This is probably the easiest solution.
- Lower the screen brightness. A brighter screen uses more power. You can adjust this in your phone’s settings. I’ve found that reducing the brightness can also help with eye strain.
- Close background apps. All those apps running in the background are using up battery life. Close them out before you start your VR session. You can go to your phone’s settings, then “Application”, then “Application Manager” to see running tasks and force stop them. Be careful not to stop any system processes, though!
- Turn on airplane mode. This will disable Wi-Fi and cellular data, which can also save battery life. Of course, you’ll need to download any streaming content beforehand.
Overheating can also be a problem, which also drains the battery faster. To combat this, try removing the backplate of the Gear VR to improve airflow. Some people even use small fans to keep their phones cool, but be careful not to introduce moisture.
Also, remember to take breaks! The official Oculus manual recommends breaks every 20 minutes. This is good for your eyes and your phone’s battery.
Conclusion
So, there you have it! Watching 3D movies on your Samsung Gear VR really isn’t that hard once you get the hang of it. It’s mostly about getting your files in the right spot and making sure they’re the correct type. This whole setup opens up a pretty cool way to watch movies, making it feel like you’re right there in the action. It’s a neat experience, and hopefully, this guide helped you get everything working smoothly. Enjoy your movie nights!
Frequently Asked Questions
Which Samsung phones work with the Gear VR?
The Samsung Gear VR works with specific Samsung Galaxy phones. Make sure your phone is one of the supported models, like the Galaxy Note 5, S6, S7, or newer versions that fit the headset.
How do I watch my own movies on the Gear VR?
You can watch your own movies by putting them in the right folder on your phone. Then, use the Oculus Video app on your Gear VR to pick your movie and even choose a cool virtual theater to watch it in.
What are the different types of 3D movie formats for Gear VR?
3D movies for Gear VR usually come in ‘Side-by-Side’ (SBS) or ‘Over/Under’ formats. SBS means the two images for 3D are next to each other, and Over/Under means one is on top of the other. The Gear VR needs to know which type it is to show it correctly.
Can I watch Netflix in a special mode on Gear VR?
Yes! The Netflix app on Gear VR has a special ‘VOID theater’ mode. If you look straight up in the app and tap the select button, you’ll enter this mode. It’s great for watching movies while lying down and can even save battery.
How can I make my movie watching experience better and save battery?
You can make your movie experience better by using good headphones for sound and by closing other apps on your phone to save battery. The VOID theater mode in Netflix also helps save battery because it uses less background graphics.
Can I show others what I’m seeing in my Gear VR or record it?
Yes, you can share what you’re seeing in your Gear VR! You can stream your VR view to a TV so others can see it, and you can also record your VR sessions to watch later or share with friends.
21 Responses to Watch 3D Movies on Samsung Gear VR: Your Ultimate Guide